
 This is the most basic no-sew pocket, an inline pocket.
It works for both top down & bottom up garments.
(The technique is the same as that for simple thumbs on mittens or gloves.)
Knit the lining with a contrast yarn. Or not – for more subtlety if subtlety is your thing.

1. Placement.
Knit to where you want your pocket opening.
Knit x stitches with waste yarn – this is a place holder for your pocket.
(X is the width of your pocket – my pocket is 15 stitches wide.)
Slip these 15/x sts back to Left Needle.

2. Knit across the same 15/x sts again, this time with your working yarn.
That’s it for now.
 The placeholder waste yarn knitted into the fabric
2b. Just carry on knitting your pullover or cardigan as before.
And then… you can either knit the pocket when your sweater is all finished or after a few more rows, say another 5–10 cm (2–4 in) of knitting.

3. Pick up the pocket stitches.
Thread a needle through each stitch below the waste yarn, catching the right leg of each ‘V’.
(If magic looping, LOOP cable now).
Continue to thread needle through every stitch above the waste yarn.
Make sure you catch every stitch.
I knitted my pocket on one long circular needle with the magic loop method.
Double pointed needles or two circulars would also work.

4. Remove waste yarn.
 4b. You have a hole!
That’s good. That’s where your hand will go. Well, the pocket, too.
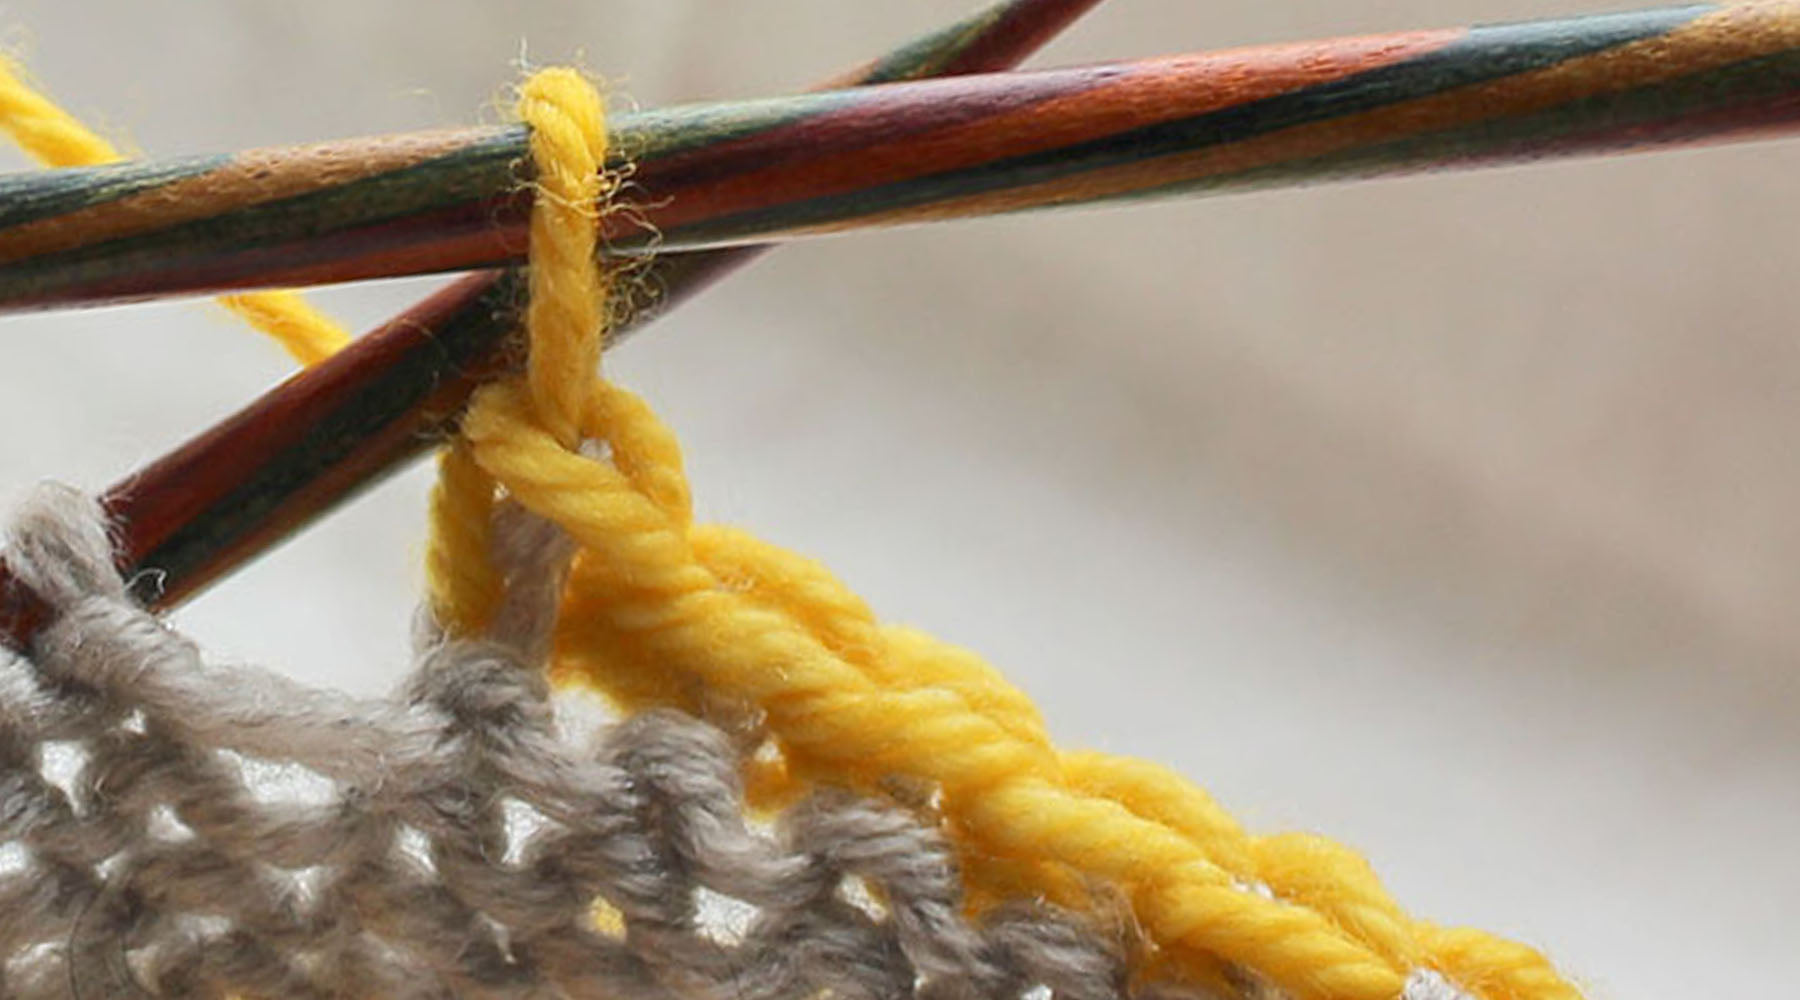
![]() 5. Join lining yarn – in same or contrasting colour.
5. Join lining yarn – in same or contrasting colour.
Knit the 15/x stitches below the opening. Then pick up and knit one more (where the arrow points) in the gap.
(if magic looping, loop the cable now)

5b. Knit the 15/x stitches above – and again pick up and knit one more stitch in that gap.
= 32 stitches (2x + 2 stitches)
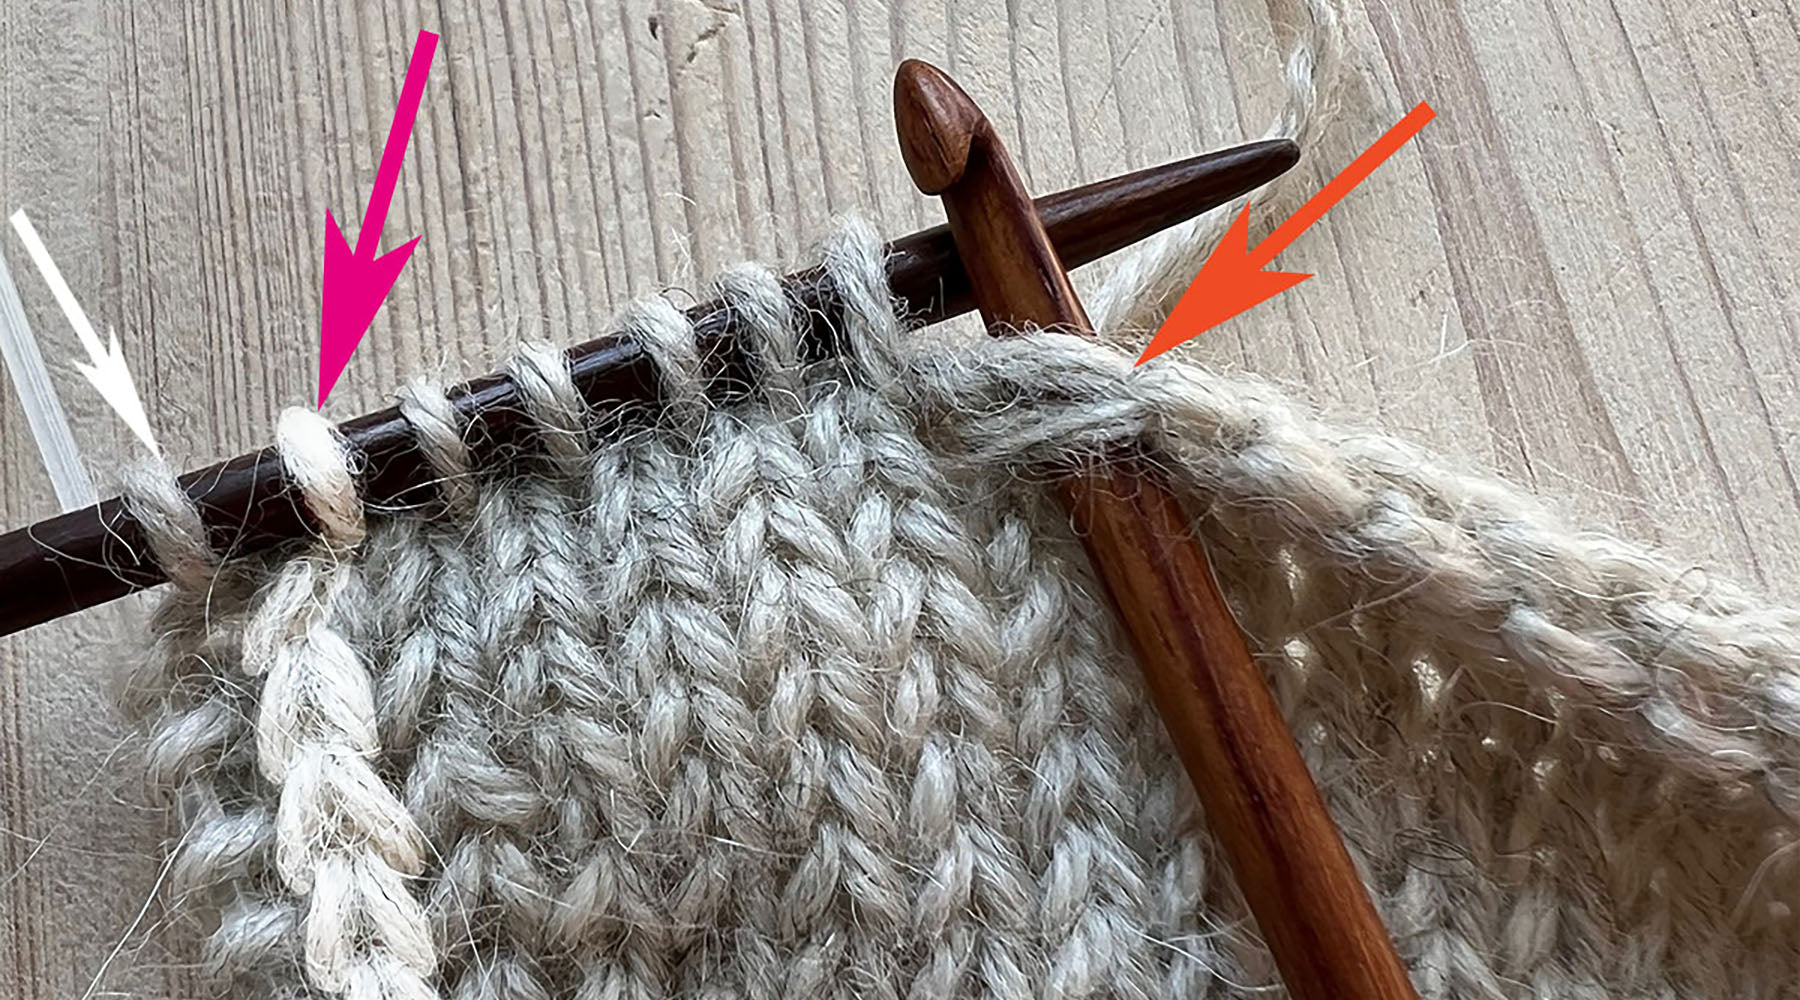
 6. Next round: p16, loop cable, k15, p1 (loop cable).
You now have a purled folding ridge along the lower edge of the pocket opening.
The last stitch on each needle (the ‘gap stitch’) is worked as a garter stitch (k1/p1 on alternate rounds) to create a better fold so the pocket lies flat on the inside.

7. Knit in the round for as long as you want the pocket deep.
You’re basically knitting a protruding tube.
 8. Push your pocket through the opening to the wrong side.
This is a very shallow pocket. But you get the idea.
 9. Close the pocket with a 3-needle bind off.
 Done!
Done!
This is the pocket you’ll find on my Filojokus sweater. It’s also the alternative and easier-to-knit pocket on a recent design, Mayhemma. Indeed, you can substitute this pocket just about anywhere, such on Bambasala, a warm and wooly cardigan that features double-knitted pockets which admittedly are a bit fiddly.
Something to think about: the edge is likely roll if you are making this pocket in stocking stitch fabric. An easy remedy is to rib half of the lining stitches (the ones inside the lower edge of the opening) on the first few rounds.
Alternatively, rib the first few rows of the outside layer (the actual sweater) just below the pocket.
If you are up for more intricate pocketry, there are other solutions and including slightly mind-boggling variants – you'll find them in the tutorial section in my first book, Ziggurats: 16 Elegantly Seamless Knits.
Want to know what’s up my knitted sleeve? Sign up for the occasional Åsa Tricosa Newsletter.