
p&p: p&k from RS
The first cap pickup happens at the end of Step 3 – at the end of a WS row.
You are continuing the WS row but will work from RS.
This way you can see what your stitches are doing.

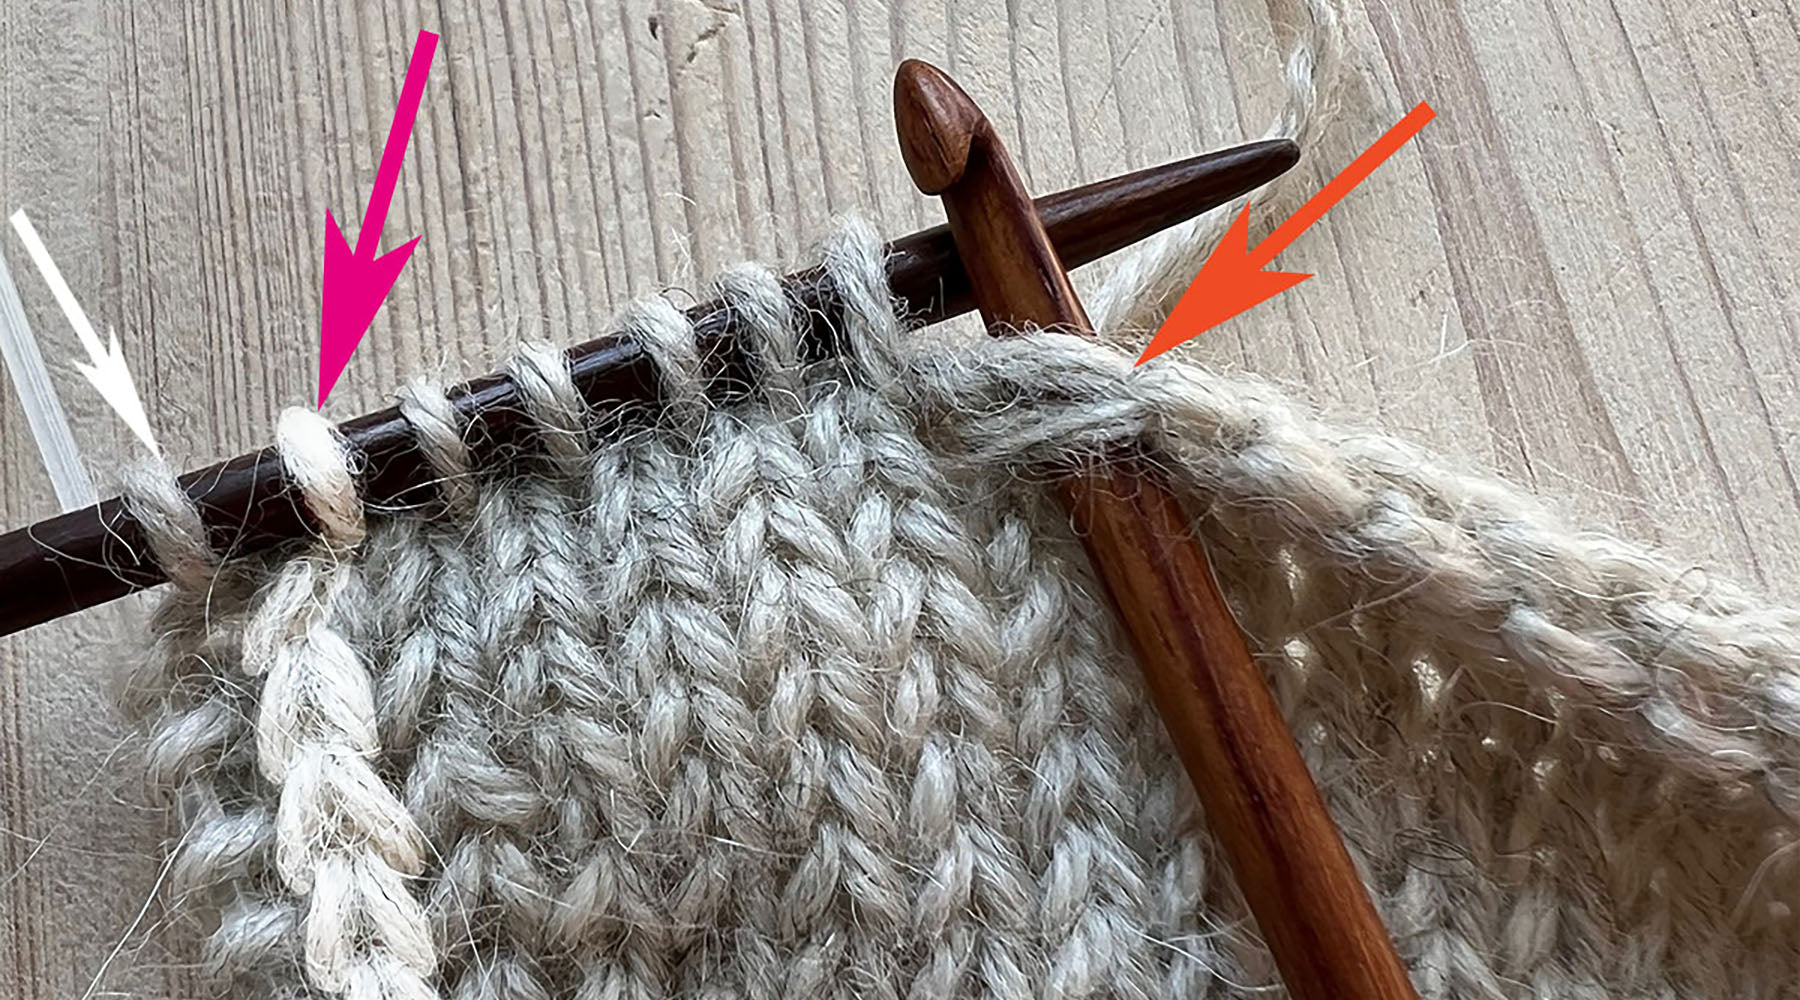
This is the left back shoulder at the end of the final WS row. The edge-stitch column (orange arrow) and slipped-stitch column (pink arrow) tend to roll toward WS.

Turn to RS.
Flatten fabric and p&k next to (outside) the slipped stitch (pink arrow), clean between edge stitch and the slipped stitch.
Pick up going from left to right, placing new stitches on left needle as you go.
Leave stitches a little loose so you can clearly see your slipped stitches. Tighten stitches when all stitches have been picked up.

DETAIL: note two bars (white arrows) between each new cap stitch.
Outside the cap stitch there are also two strands – this is the whole edge stitch (orange arrows). The slipped stitches run in an intact column or chain (pink arrows) inside the new cap stitches.
This is the basic Ziggurat cap – for some designs you pick up extra stitches between some of the double bars.
You are done with Step 3. Congratulations!
Step 4 starts with a tricky manoeuvre to get the slipped cap stitches to line up nicely from back to front before they continue down to the armhole.
(see pick up shoulder stitches)
End of Step 4: p&k cap stitches at the end of a RS row

At the end of Step 4, you p&k (pick up & knit) cap stitches from RS.
Twice.
First you p&k cap stitches for the second half of Left Sleeve cap (see Ziggurat Steps).
After knitting across the back to Right Shoulder, p&k cap stitches for the first half of Right Sleeve cap.
You still pick up clean between the slipped stitches and the edge stitches.
It's an easier pickup because you are working in the direction of knitting.
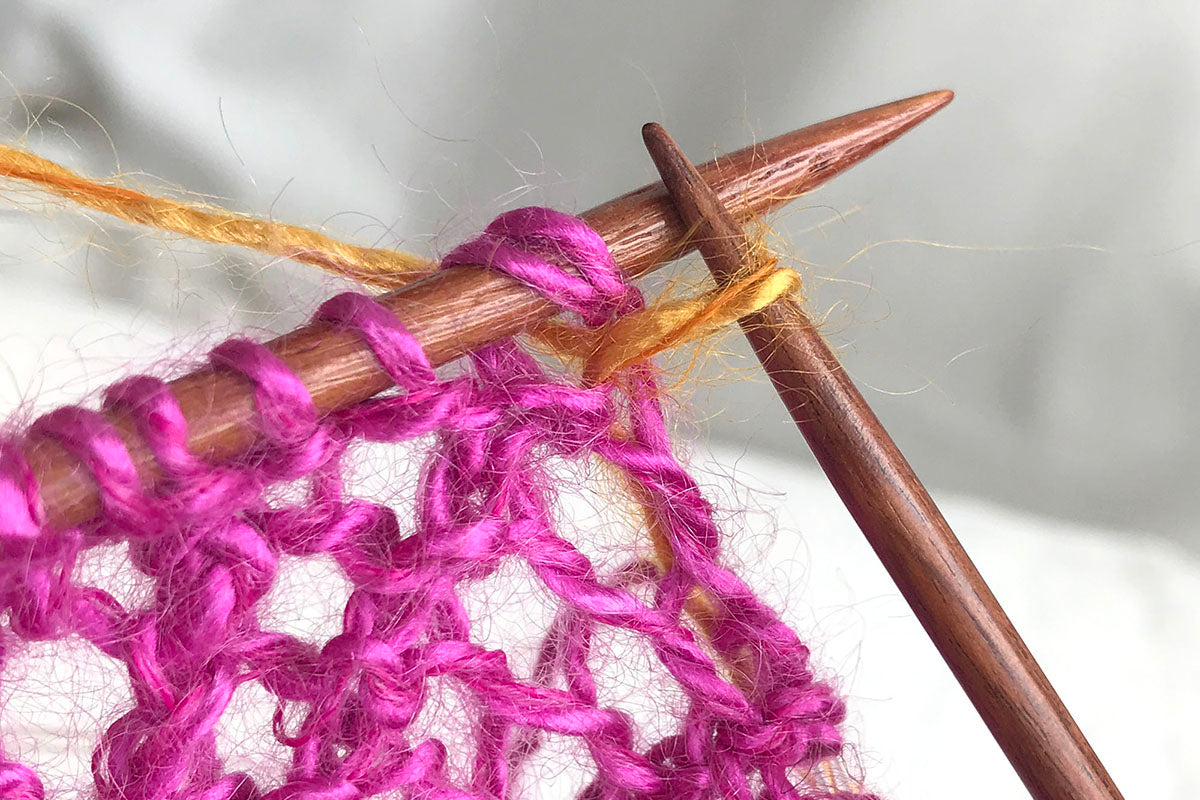
In the photo you can see how the cap stitches form a nice row outside the slipped stitches – there is nothing (no extra yarn nor strands) between the slipped stitch column and the cap stitches on the needle.
You are done with Step 4. Congratulations!
Step 5 begins, as Step 4, with the tricky manoeuvre to make the slipped stitches line up nicely from back to front (see tutorial for shoulder stitches in Step 4).