
a photo tutorial from the NEW Ziggurat Book
(also in the first Ziggurat Book)
While the German short row is my go-to short row, the Japanese short row is less conspicuous. It is a bit more fiddly but also more precise. This is useful if you are knitting with a brighter yarn or one that has a sheen or a very clear stitch definition that doesn’t let you hide unevenness or tricksy moves.
Great for Bust Darts
I often use it for bust darts knitted with such unforgiving yarns.
Well, I now tend to use it for all bust darts in any yarn for the precision is so pleasing.
Abbreviations
Jsl1 hang removable marker on working yarn, knit/purl next stitch with marker hanging on WS between this stitch and the slipped stitch
Jk1 knit to gap, pull on marker to place loop untwisted onto LN, k2tog (next stitch and loop), remove marker
Jp1 purl to gap, sl1, pull on marker to place loop untwisted onto LN, purl the loop, pass slipped st over purled loop, remove marker
Let’s begin – we are working in plain stocking stitch.
The photos are arranged in the order you would work Japanese Short Rows for a bust dart on a Ziggurat pullover knitted in the round.

1. RS: knit to the point for turning.
Turn work over to work from WS.

hang a locking stitch marker on the working yarn, sl1wyf (pink arrow), purl next stitch – the marker sits on the yarn between the slipped stitch and next stitch.

3. Marker is hanging on yarn (white) between slipped stitch (pink) and next stitch.
Purl to next point for turning.
Turn work over to work from RS.
4. Purl to next point for turning. Turn work over to work from RS.

5. Jsl1 on RS: hang a locking marker on working yarn on WS, behind needle. Slip 1 stitch with yarn in back. Knit next stitch and make sure that the marker sits on yarn between the slipped and the next stitch.

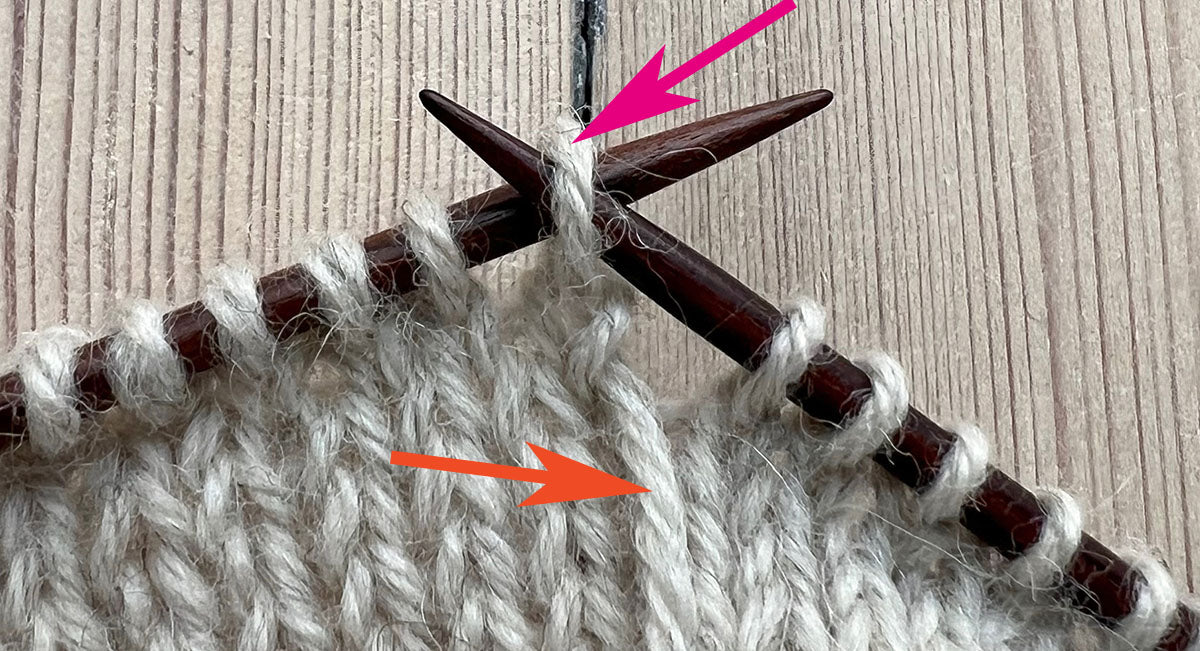
6. (Continuing on RS) Knit to the gap (pink arrow). The marker sits on WS between the last 2 stitches on RN.

7. Jk1: go in front of working yarn (orange arrow) and behind last stitch on LN to pull on marker to make loop (white arrow) available

8. Place loop on LN, with its right leg to front (untwisted) and in front of the working yarn, remove marker.

9. k2tog: loop (white arrow) and next stitch. Jk1 is done.
For bust dart: repeat Steps 1 & 2 before continuing with Step 10.

10. Jp1 on WS: purl to gap. The marker sits between the last 2 stitches on RN.

11. Slip 1 stitch purlwise (pink arrow).

12. Move yarn out of the way. Pull on loop (white arrow). pink arrow: slipped stitch orange: yarn

13. Place loop on LN with its right leg to front, going under yarn (orange) and in front of the slipped stitch (pink) on RN. Remove marker.

14a. Purl the loop.
pink arrow: slipped st
white arrow: loop
orange arrow: purled loop

14b. Pass the slipped stitch over the purled loop.
 15. Adjust the tension of the last 2 sts. Jp1 is done.
pink arrow: slipped st passed over
orange arrow: purled loop
white arrow: loop
NOTE for short rows in the round: make your final turn a German Short Row turn (in place of the Jsl1 make a sl1^). This resolves more neatly when going back to knitting in the round – especially if you use Patty Lyons' clever solution:
Knit to 1 st before ^st, sl1 knitwise, knit the longer leg of ^st tbl, pso, knit the shorter leg of ^st tbl) – see my photo tutorial here.
![]()
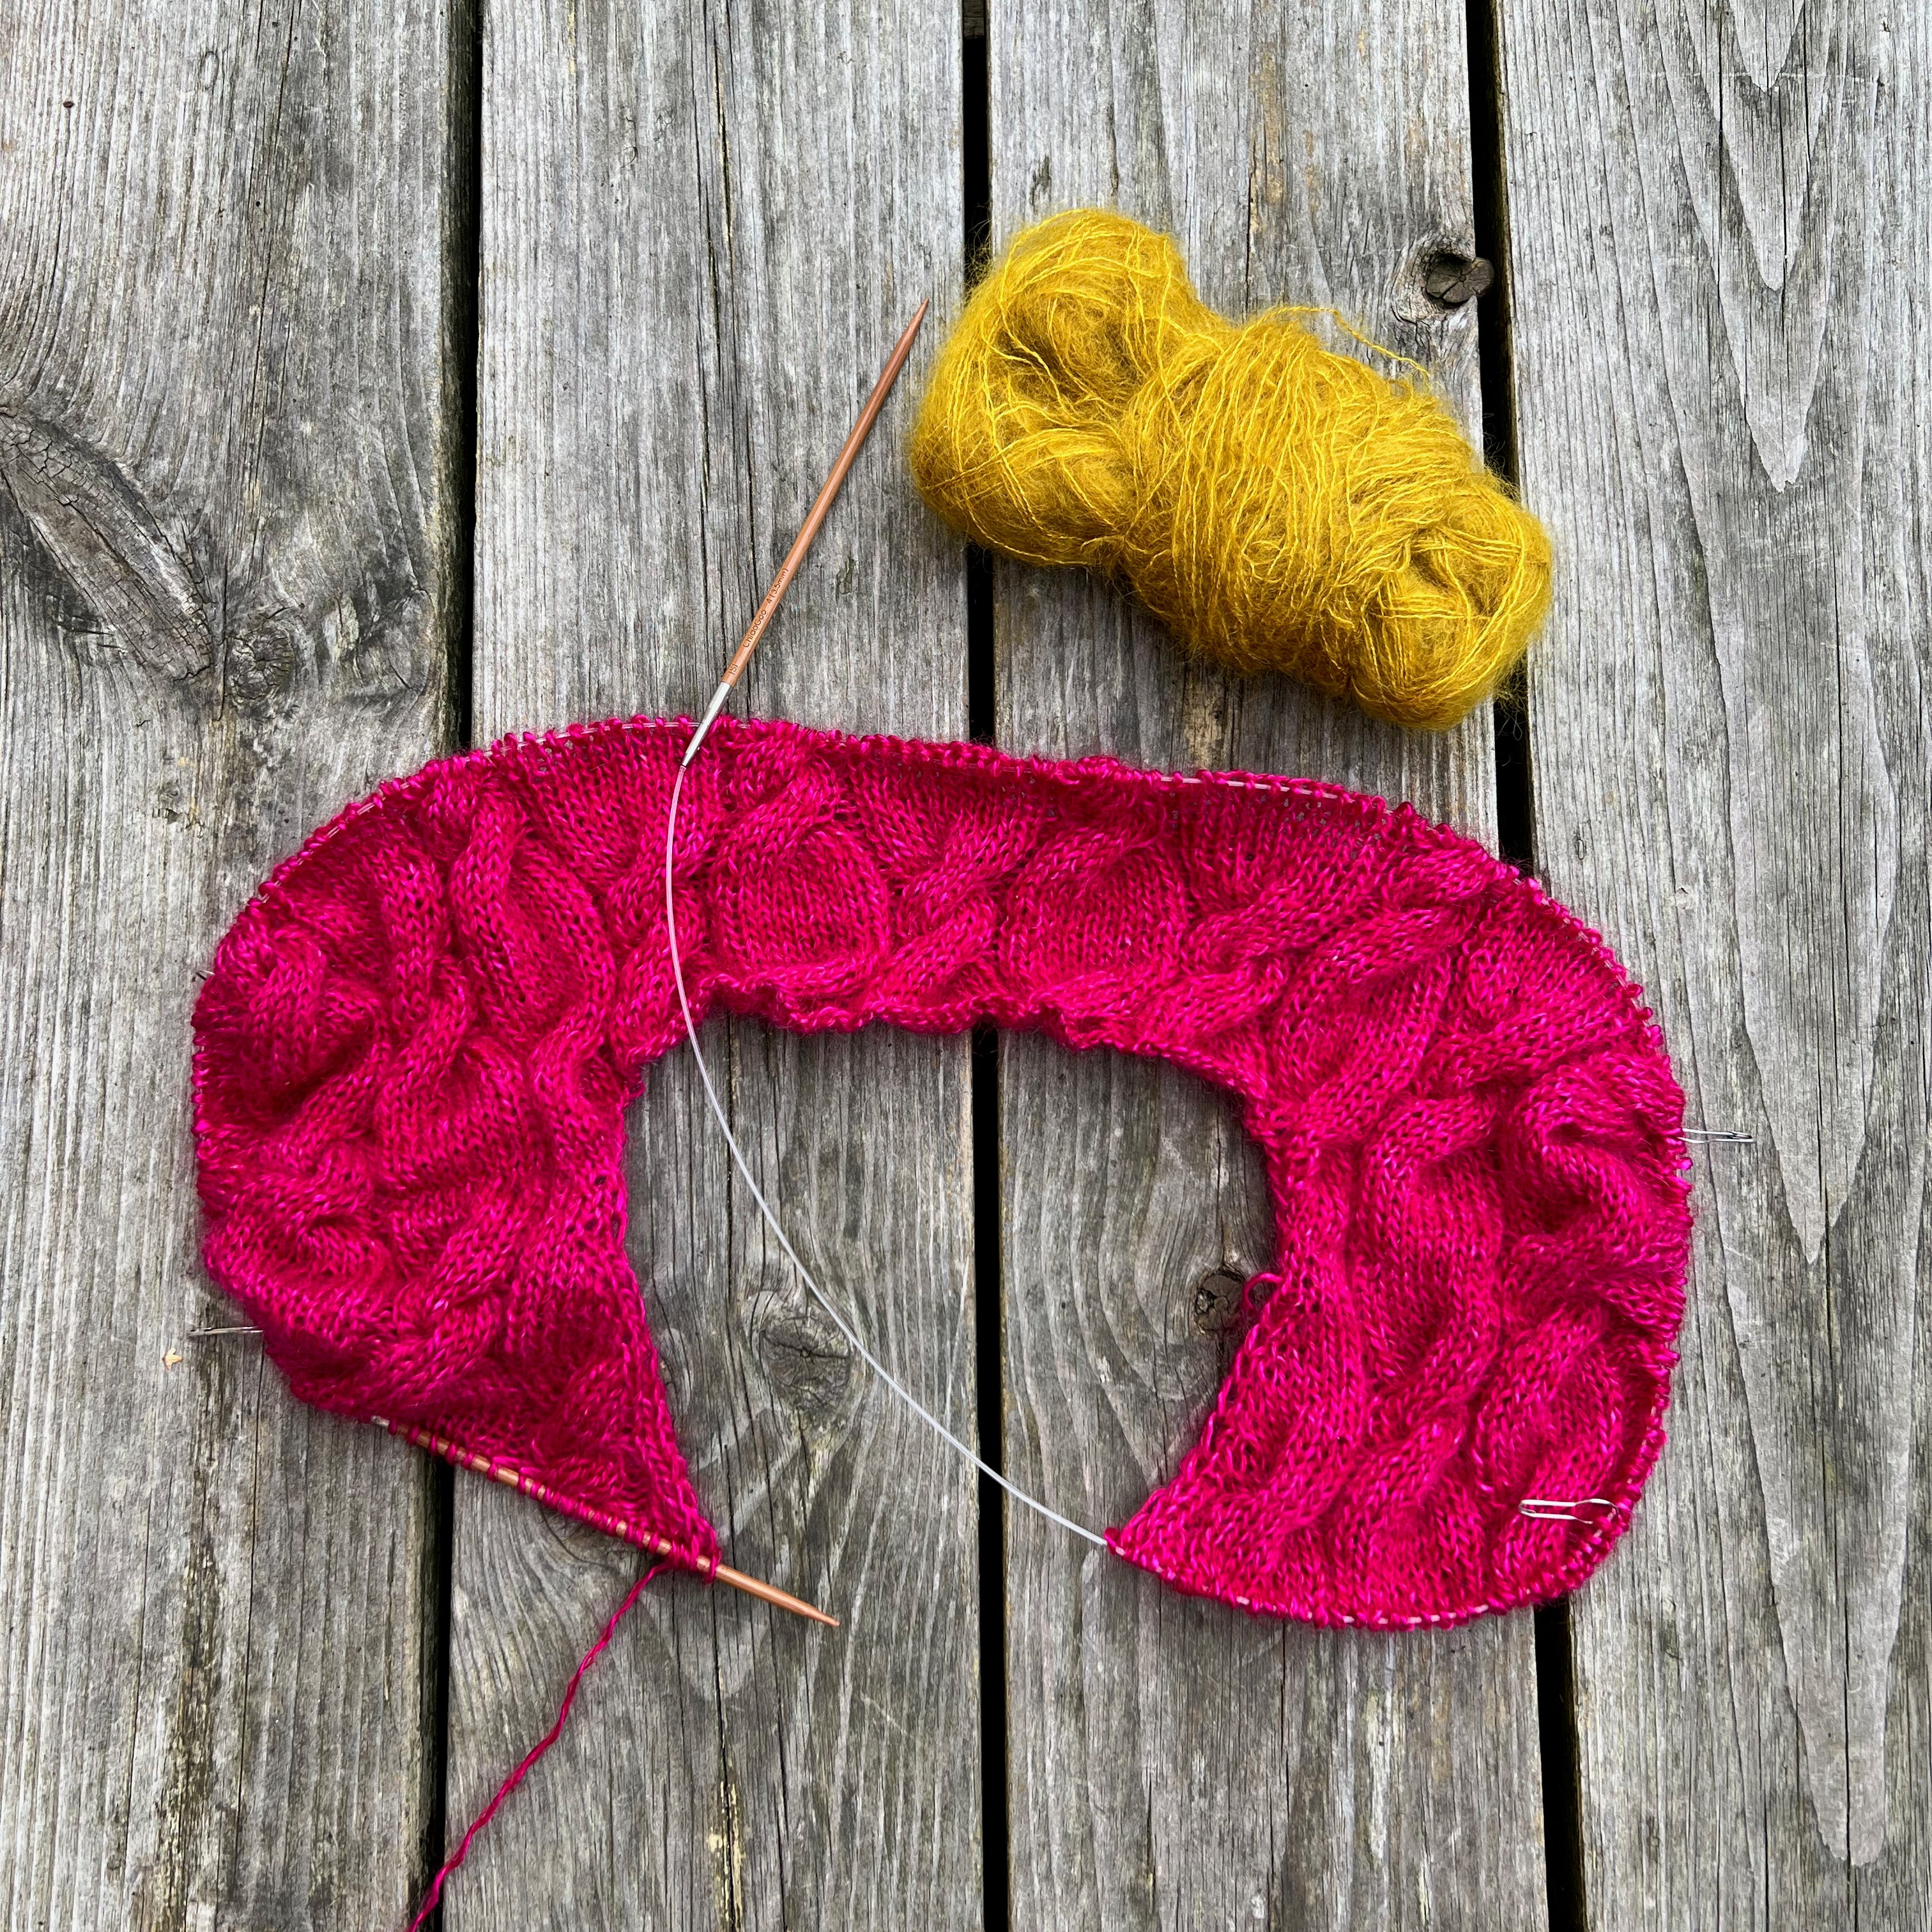
You have to look pretty closely to spot the short-row dart.
Yes, the dart sits too low on Greta – she is perkier than I.
Besides, the pullover (Chatoyant) was not knitted for her.
Want to know what else is up my knitted sleeve? Sign up for the occasional Åsa Tricosa Newsletter.