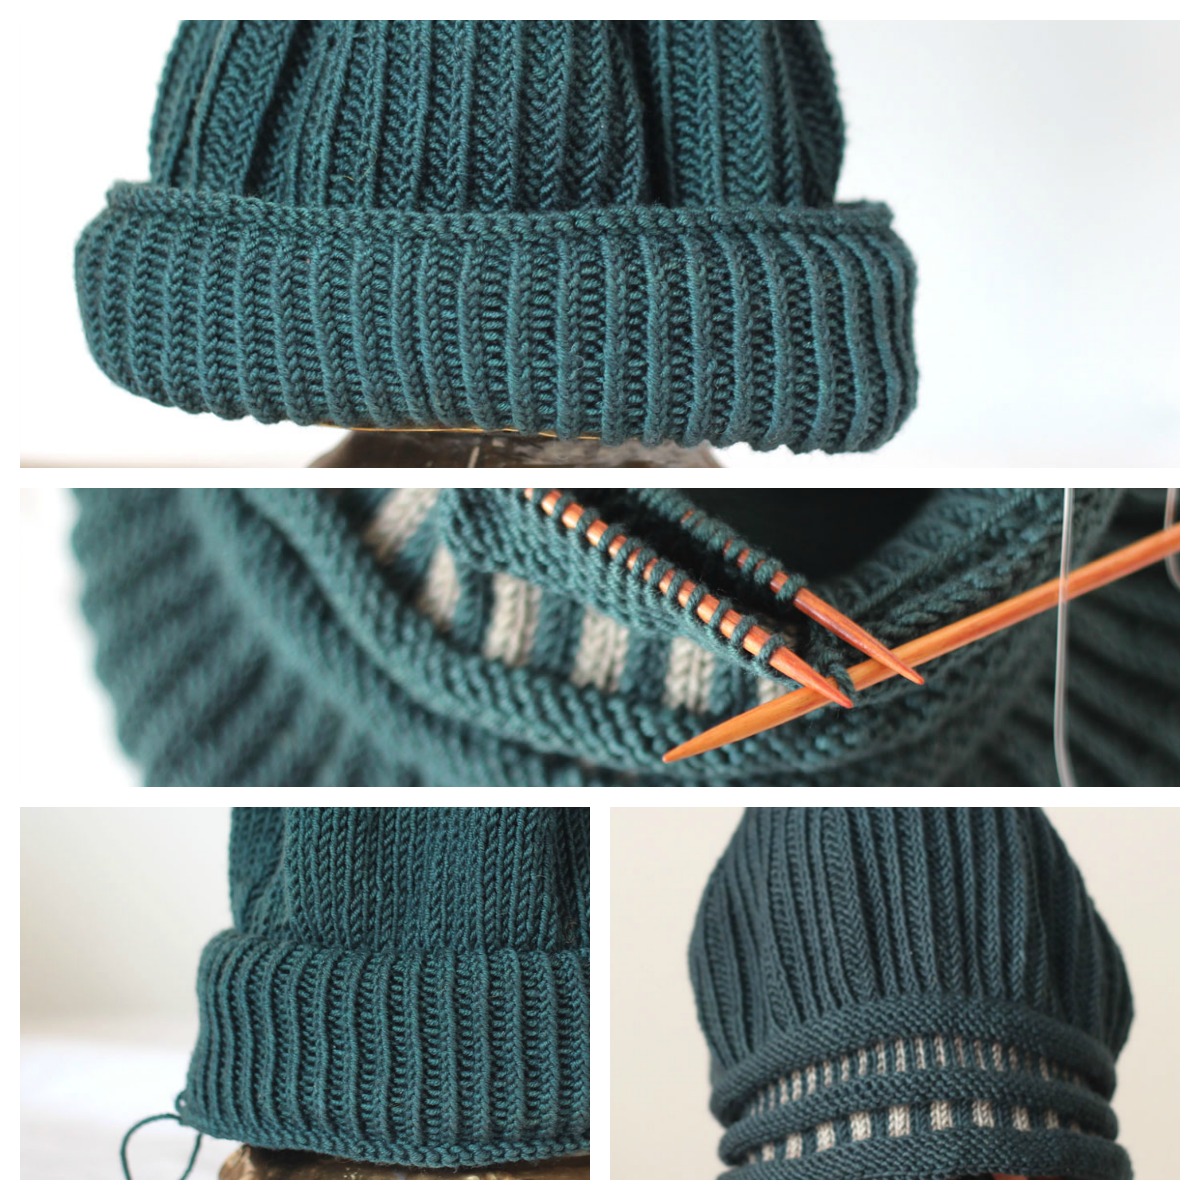
lined hem & brim
Photo tutorial for a non-sew invisible lined hem or brim (or cuff)
The contrasting lining can be knitted before or after you finish the outer layer of the hat (or cuff or garment).
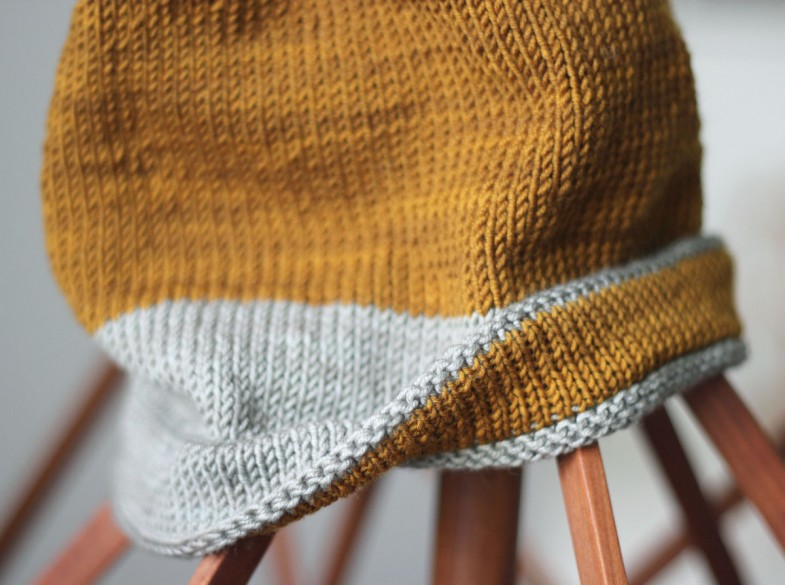
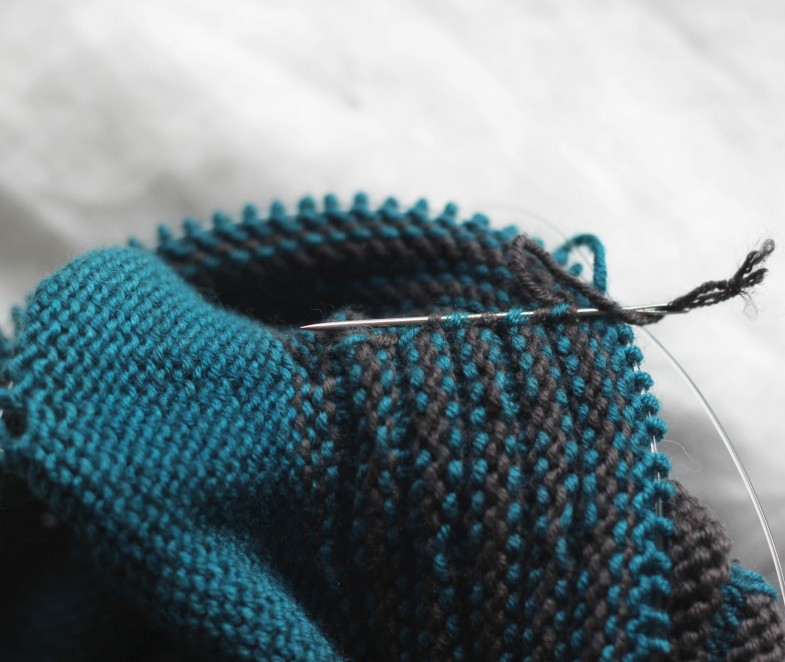
The picking up is done with the working RS yarn to avoid any colour bumps showing through. That said, on the hat above the picking up was done with the contrasting lining yarn – a thinner yarn (4ply) than the hat yarn (DK) and there is no peeking through.
1. Push all stitches away from needle tips so that stitches sit freely on the circular cable. This gives more room to pick up each stitch.
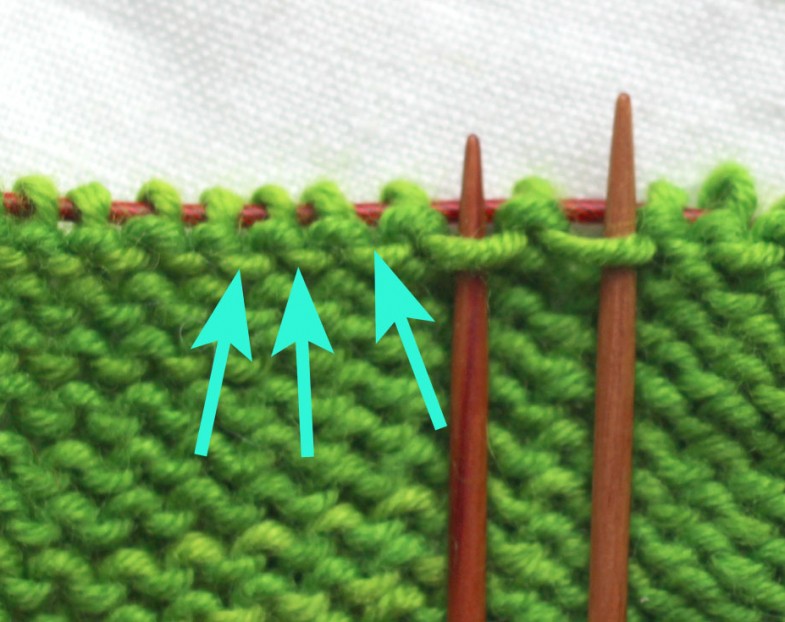
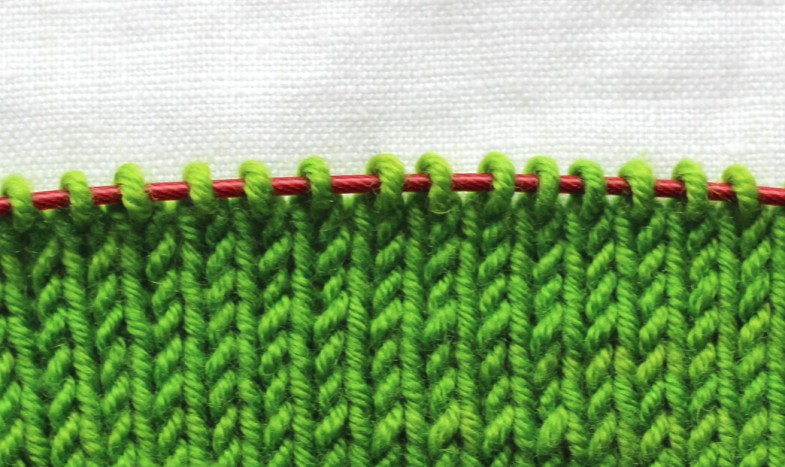
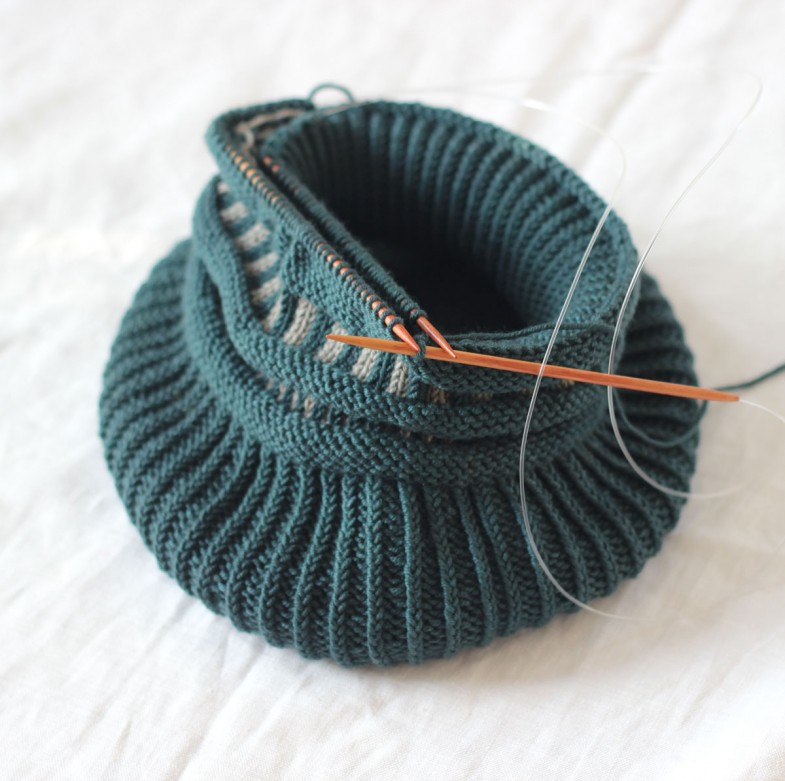
2.WS: Needle tips are inserted in the bars between stitches. Pick up & knit in these bars. (The arrows point to the next three bars.
3. From WS and with a smaller needle, and using the working yarn from RS (a contrasting yarn is used in photos for visibility), pick up & knit 1 stitch in each bar across the round.
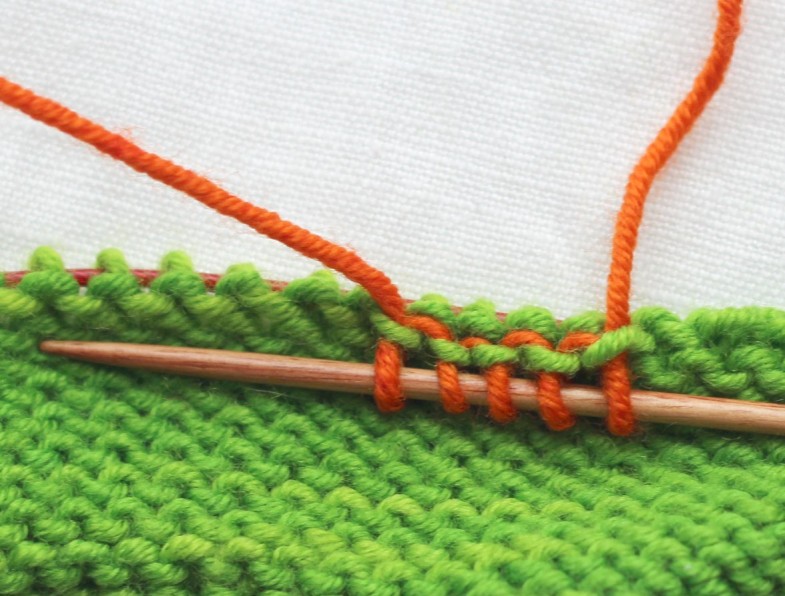
3b. Another view of the picked up stitches (needle folded down).
4. Knit lining along and from the inside of the hat (garment) to desired length.
For the ZiggurHat in the photo the lining is 3 cm (2 1/4 in). Cut lining yarn.
5. Finish the outer layer. That is, knit to just barely longer than the lining — if it is equal length or shorter, the lining will tend to roll outwards.
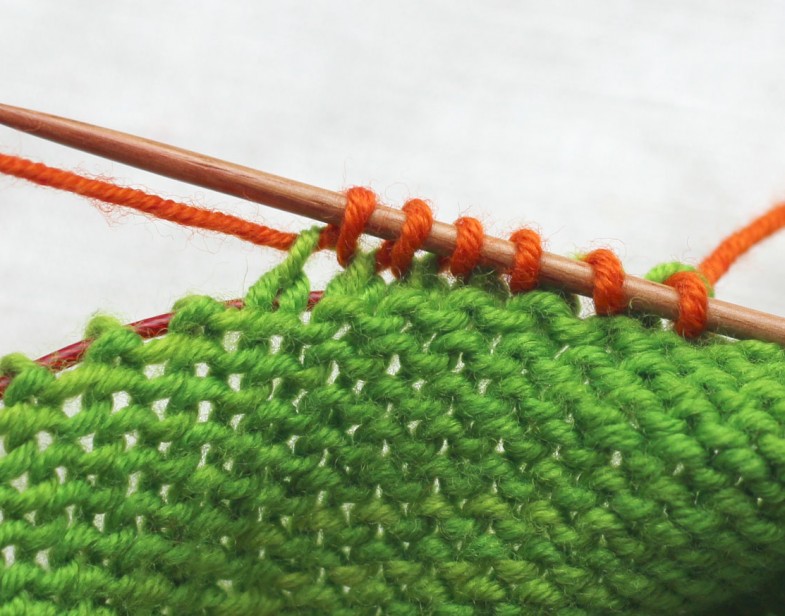
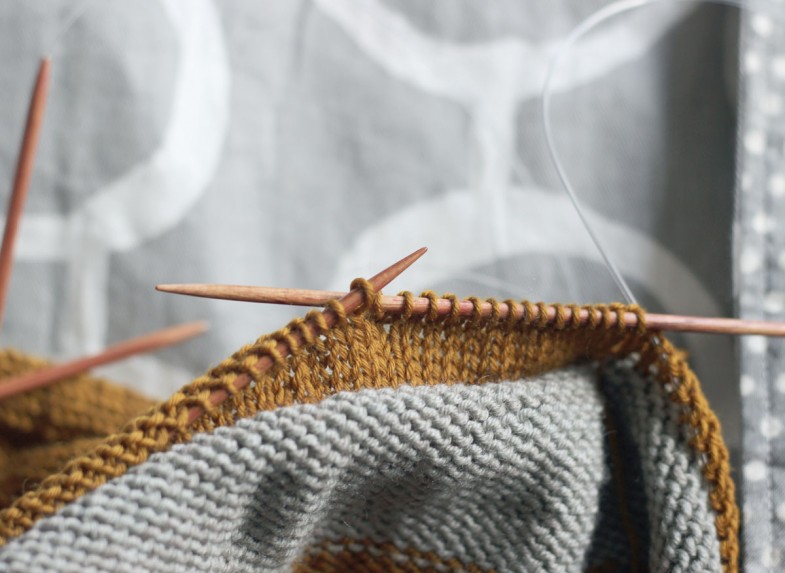
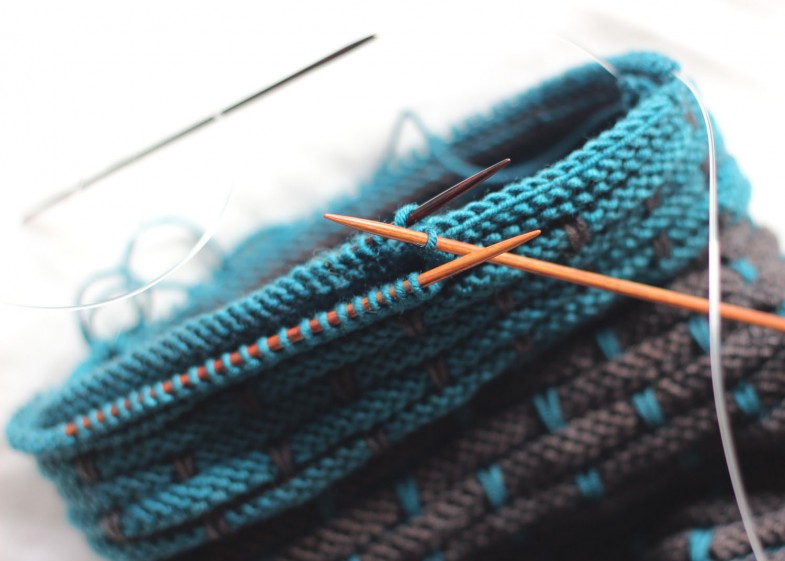
6. Cross the RS working yarn over to WS. With this yarn knit one final round on the lining (with the smaller needle). Above you see the first 4 stitches knitted with the RS yarn (and viewed from the WS of the lining).
This round is worked in order to avoid contrasting purled bumps after binding off.
7. Weave in loose ends before closing the brim or hem.
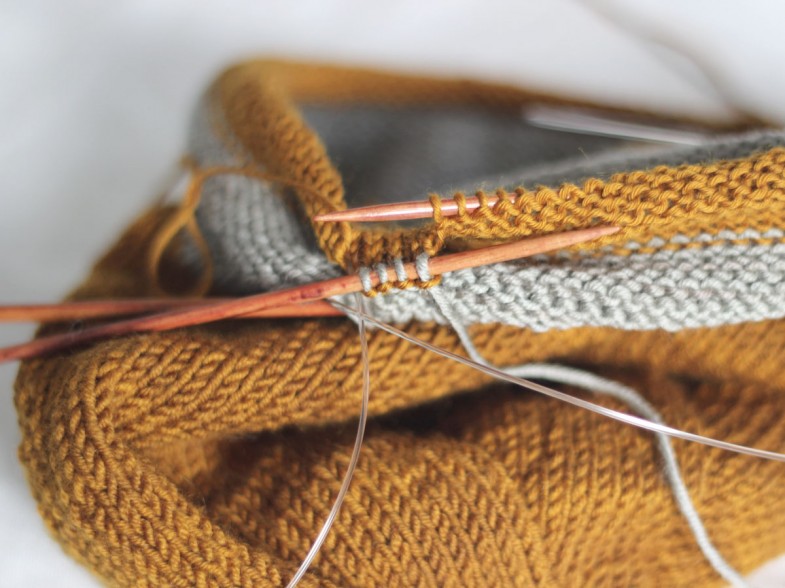
8. Bind off from RS with larger needle and using a 3-needle bind off. Keep an even tension. The two layers will make the bind off quite stretchy, so unless you tend to tightness there is no need for a stretchier bind off technique.
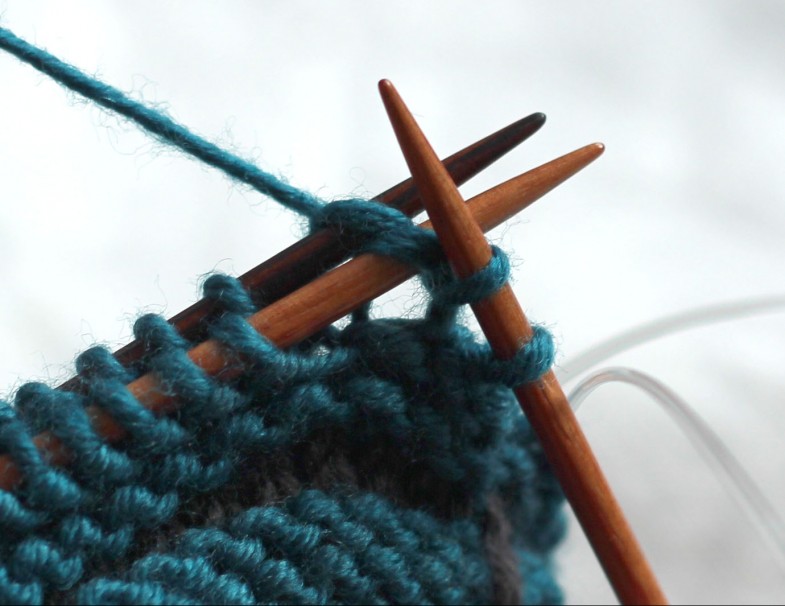
8b. 3-needle Bind Off: Knit 2 stitches together — 1 stitch from each needle.
Do this again. Bind off 1 as usual. *Knit 2 stitches together (1 from each needle), bind off. Repeat from * to end of round.
You may end up with a bit of ugliness at the final stitch. You can prettify this by finding the way the stitch runs and pull in the extra yarn and distribute it across the neighbouring stitches. If that doesn’t look too promising, instead pull it out as far as you can and weave in the extra length before fastening and weaving in the final end.
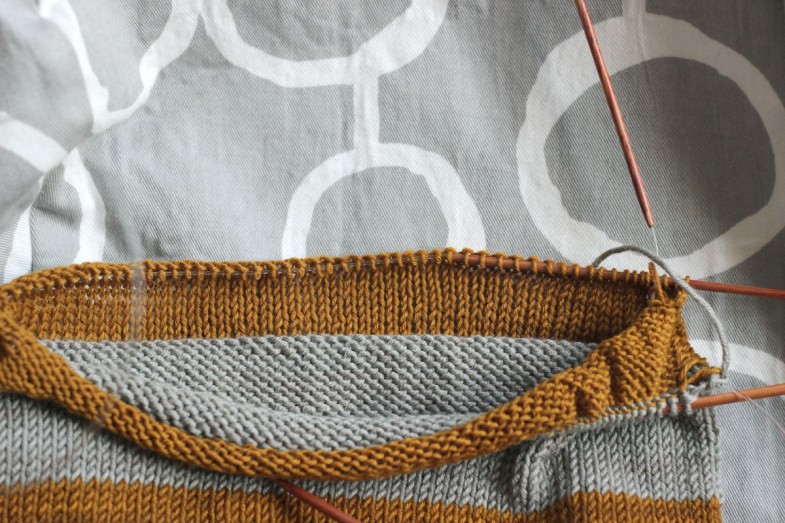
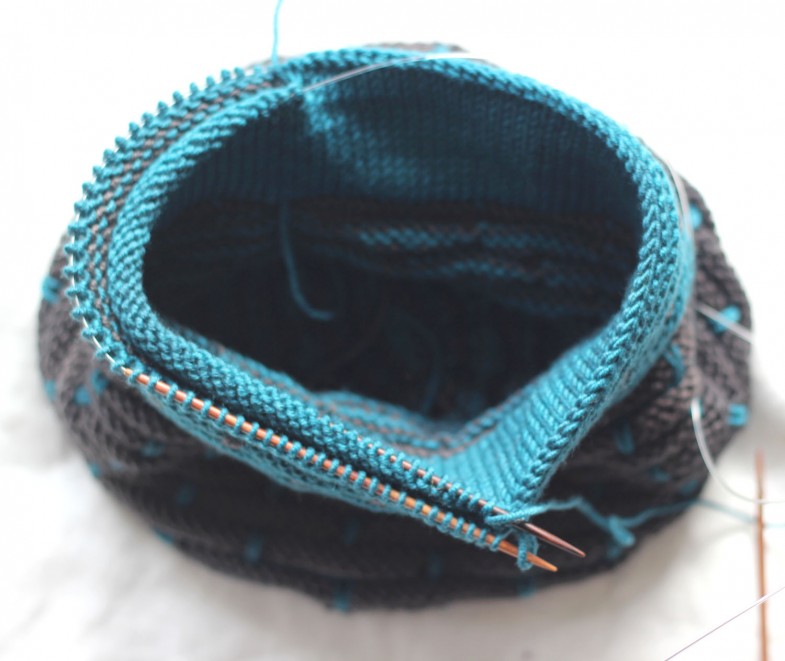
For the blue hat above (Kaul Toque) and for Callisto Hat (below) the lining stitches are picked up and knitted but then set aside while the hat itself is finished. The lining is knitted last to just shorter than the hat’s outer layer.
↑ Callisto Hat has a twisted rib lining. It too is closed with a regular knitted 3-needle bind off from the RS.
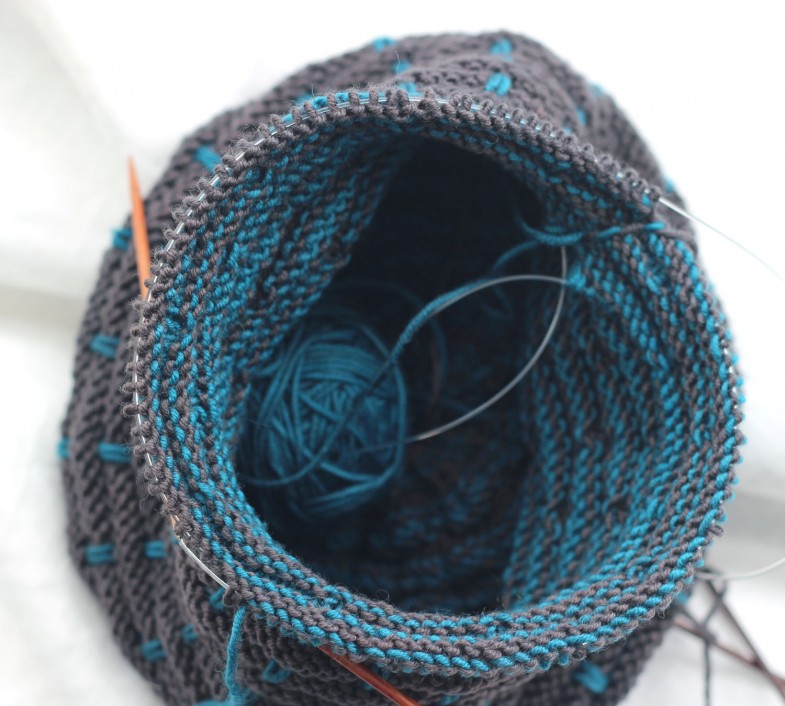
↑ The lining yarn and the lining circular needle are kept out of the way inside Kaul Toque while the hat is completed. (You can poke the lining needle tips through the lining yarn ball and the crown, and also pull the needles through to the outside to keep things in place).

↑ The hat brim is folded down (well… up, really!) to be out of the way while the lining is knitted.

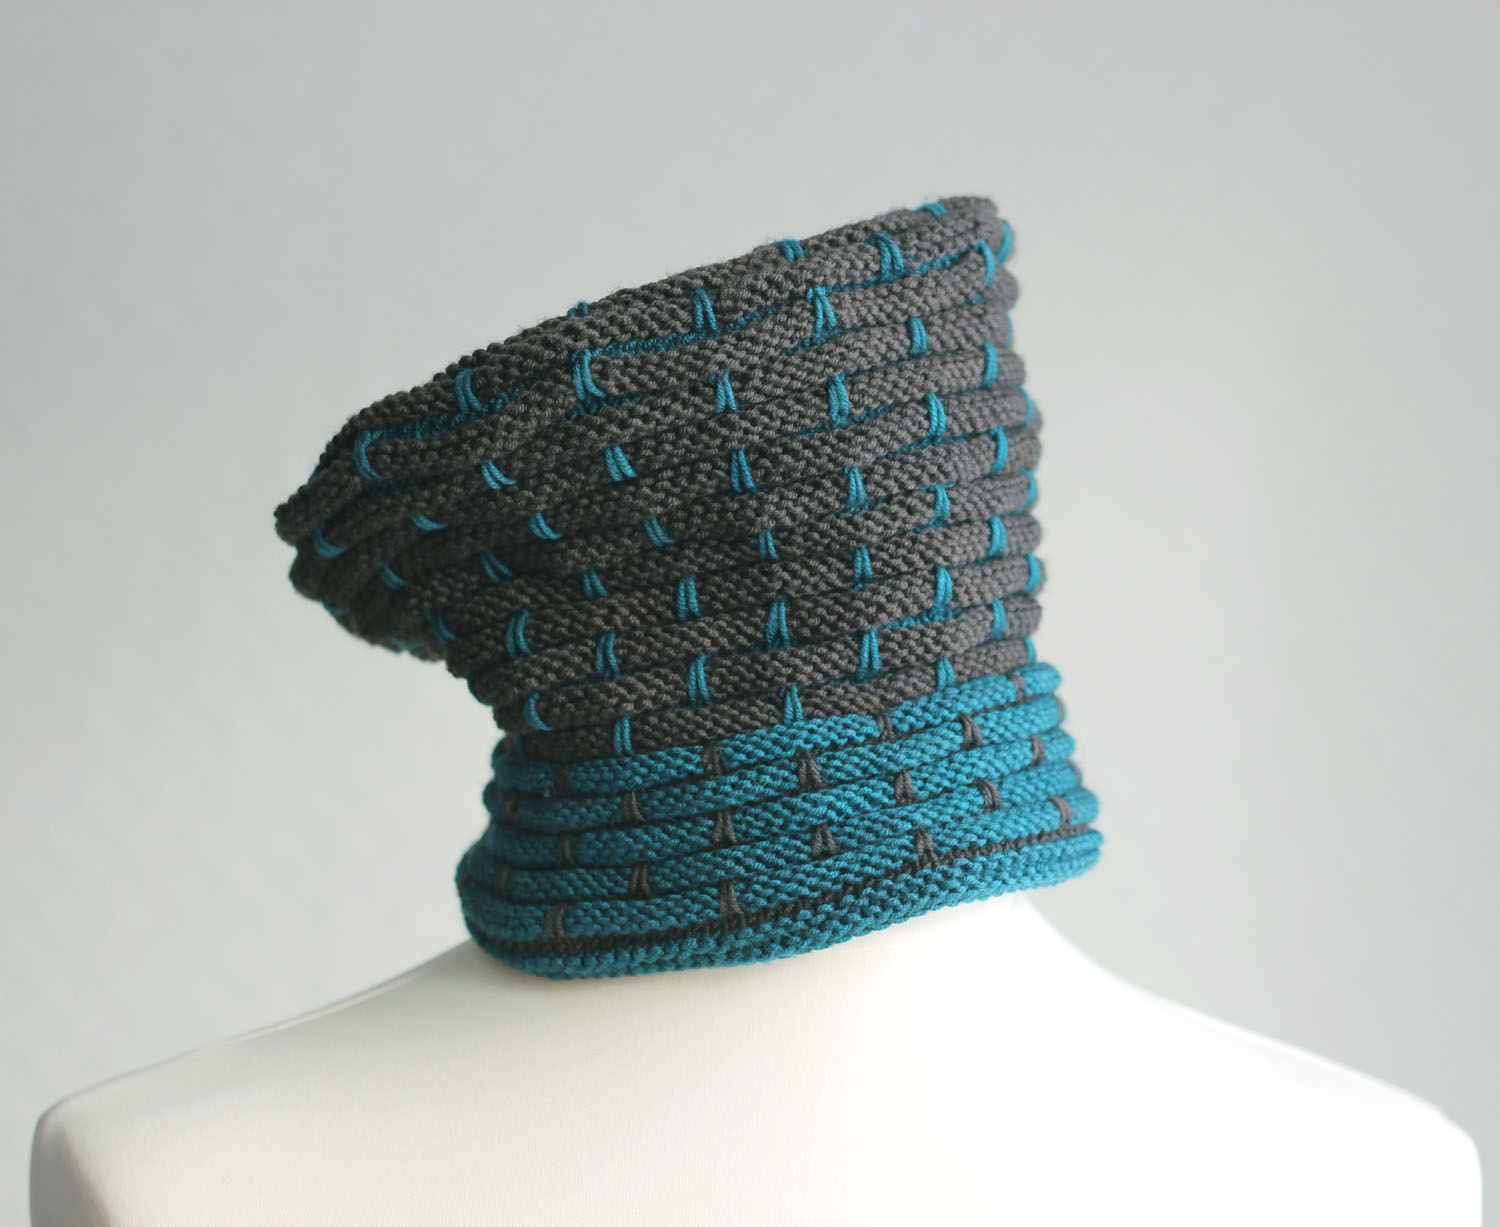
•Hats in photos: Simple ZiggurHat & Kaul Toque & Callisto Hat (patterns available individually and in the Hatalogue eBook).
•Yarn in photos: Wollmeise Merino DK — Jeton (brown), q.e.d. (light grey), Wasabi (green), Mörchen (orange), Fritzi Frizzante (blue), Ag47 (dark grey), Silberdistel (dark teal)
Want to know what else is up my knitted sleeve? Sign up for the occasional Åsa Tricosa Newsletter.

11 Comments
Great tutorial! Thank you so much Asa!
This is great Asa – thanks!
For bottom up does one just use a provisional c/o to go back to? Love to see a demo on bottom up!
I haven’t thought bottom-up – I’ve abandoned that direction. 😉
I believe many bottom-up sweaters start with a provisional cast on which is then folded inward to knit the two layers together.
Often there will be a purled “folding row.”
But yes, you could also do a top-down lined hem on a bottom-up sweater.
I’d probably knit a round or two on my sweater, then switch direction and work the lining and hem, then continue upwards.
Or something like that.
Your tutorial is excellent. But it is for knitting in the round, and I am wondering about doing this kind of hem in the bottom of a cardigan. I understand that in this case I would have to deal with holes in the corners. How would you advice to deal with that? Maybe this is the reason why you avoid this type of hem in your cardigan designs? Of course I can just sew the layers together :), but maybe there is a better and nicer alternative?
Oh but you can adapt it to be used on cardigans. Absolutely! I use it on the Ja Ja jacket, for example. And on split hems that are knitted flat (Bento Boksy, Vaudeville, and Verdite).
I often choose to double knit it so that the edges can be nicely closed. But it’s easy enough to sew them together after binding off if you prefer to knit the layers separately. Good luck!
Thank you very much, Åsa! I haven’t noticed that you did split hems on these sweaters. It is very good to know about the possibility.
I was asking because I am thinking about knitting Bambasala, Jadeite or Cajsa one day (or maybe eventually even the three of them 😉), but I love the lined hem and would like to make this little change when knitting these patterns.
I have never tried double knitting, but I love learning new things and techniques, so I may try it.
This is precisely what I hoped knitters would do with the techniques and details – put together bits from here and there to fashion your very own sweater as you like it. I look forward to seeing what you come up with. /å
I am knitting the Sammelsurium. I have picked up stitches to do the lining and am finding difficulty maneuvering in the round with the two needles.
(One holding lining stitches and one with main yarn). Do you have any recommendations to make this process easier as the needles tips holding the stitches not being used keep getting in the way. Do you use magic loop?
For the cuff linings I use magic loop. For the hem, only if I can’t find a suitably shortish circular.
If you double-knit the hem and lining, you need only one circular but that is a bit fiddly to set up. I find it faster to knit the lining first, then stick those needle tips through the body fabric to keep them in one place, while I finish the outer layer/body. If that makes sense?
Thank you so much for this! Am I right that you need needles that you’d use for magic loop to make this work? I’m trying to use standard circular needles on a sweater that are both the same size, and it’s creating a rather tense situation!
Yes, I use the magic loop a lot – good point!
You can also use two circulars if you’re not a fan of looping. /åsa