double cuff for top-down sleeve
How to knit a double cuff – for snuggly kid sweater cuffs, for example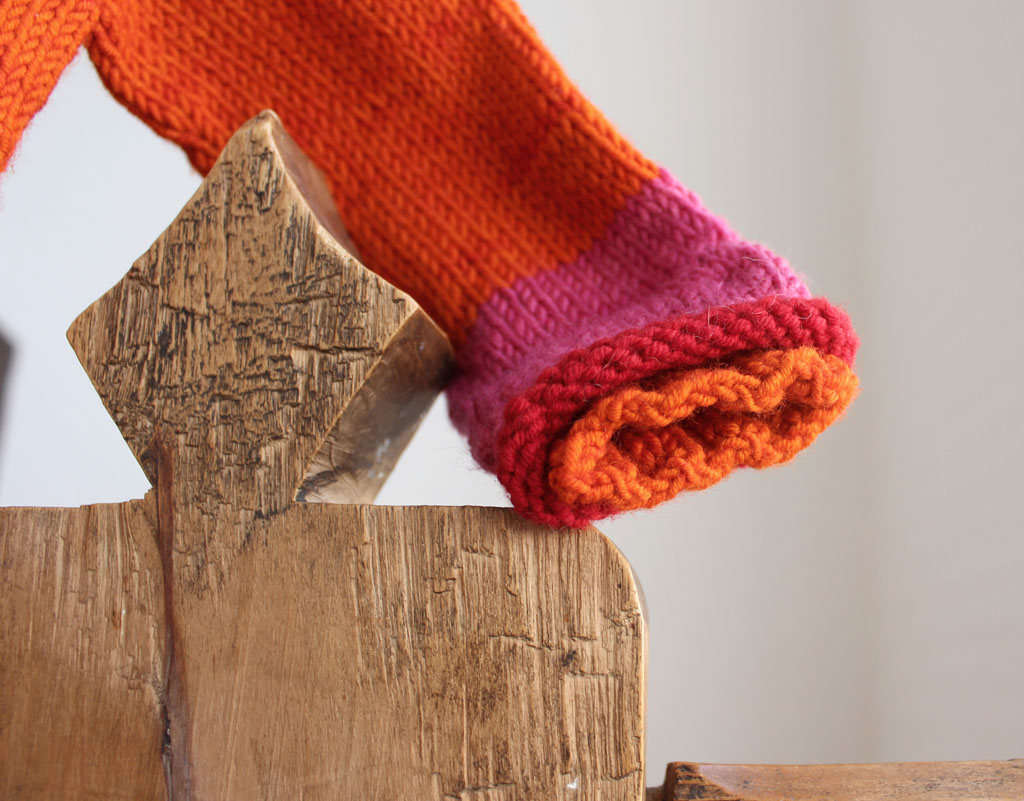
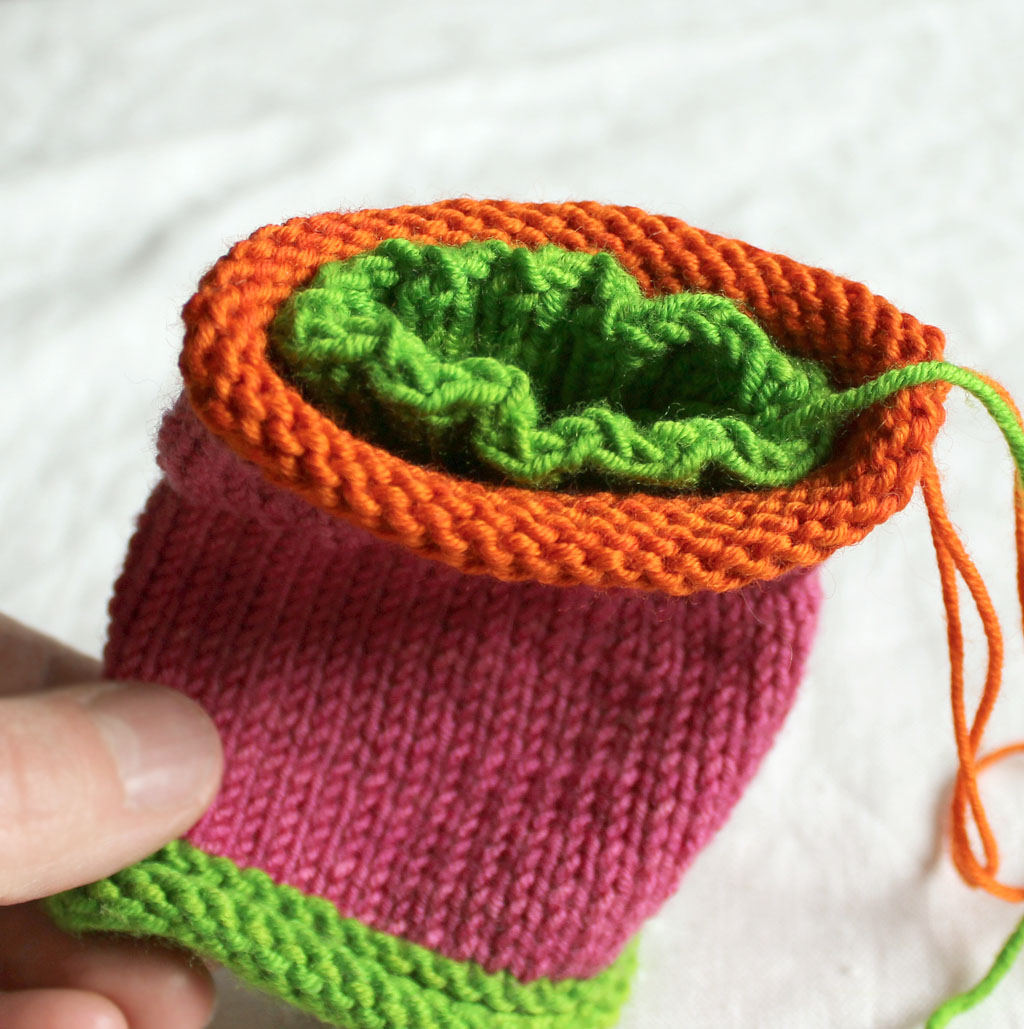
knit a cuff within a cuff on a top-down sleeve
Why knit a double cuff? Well, it keeps tiny little wrists warm, for one thing.
For another, they’re a way to add some funky colour to any cuff on any sweater – or mitten.
You need
1 unfinished cuff, 1 circular needle at least 80 cm long, 1 smaller ciruclar needle at least 80 cm long
Yarn in 3 colours
MC (pink)
CC1 (green)
CC2 (orange)
The instructions below are for a baby sweater.
In brief
- Double the stitches by knitting into the front and back loop of each stitch using two circular needles, the large tip knits into the front, the small tip into the back.
NOTE: I now have found a New & Improved SIMPLER way to pick up –> TUTORIAL - You’ll end up with two parallel rounds of stitches, one on each circular needle, the small needle inside the large.
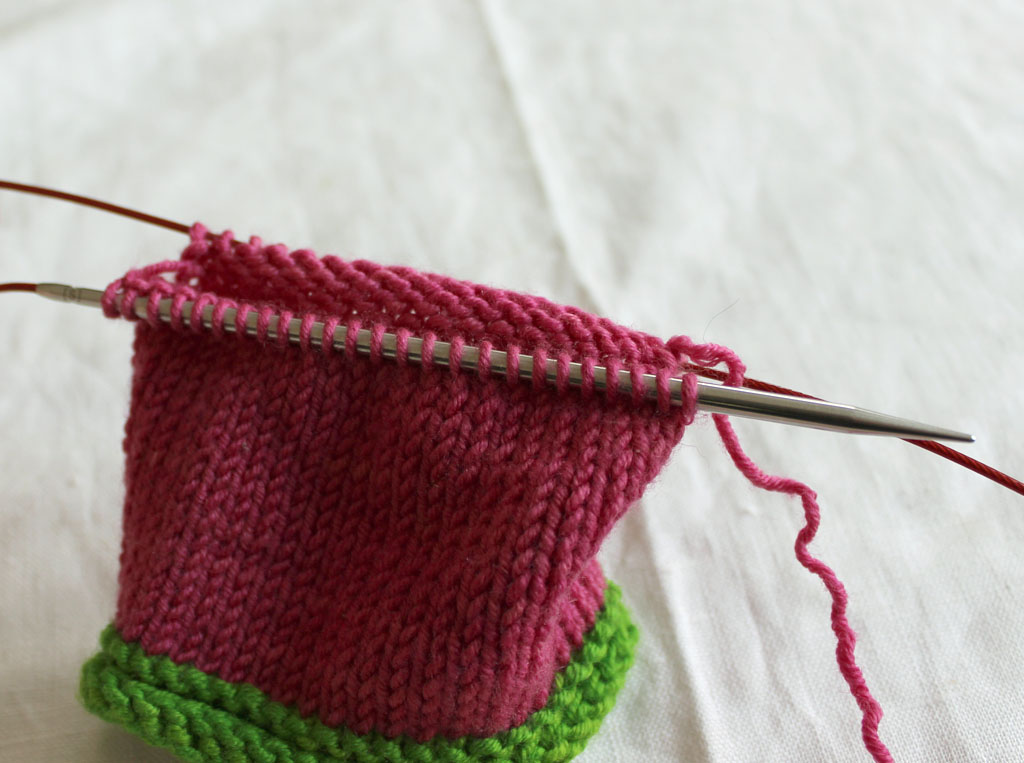
The large needle with MC is left hanging. - With the stitches on the small needle and using CC1 (green) knit 2 x 2 ribbing and then cast off.
- Continue knitting the sleeve with the large needle and MC (pink) up and around the ribbing.
- With small needle purl one round.
- Join CC2 and knit a rolling edge.
- Cast off. Done!
In more detail
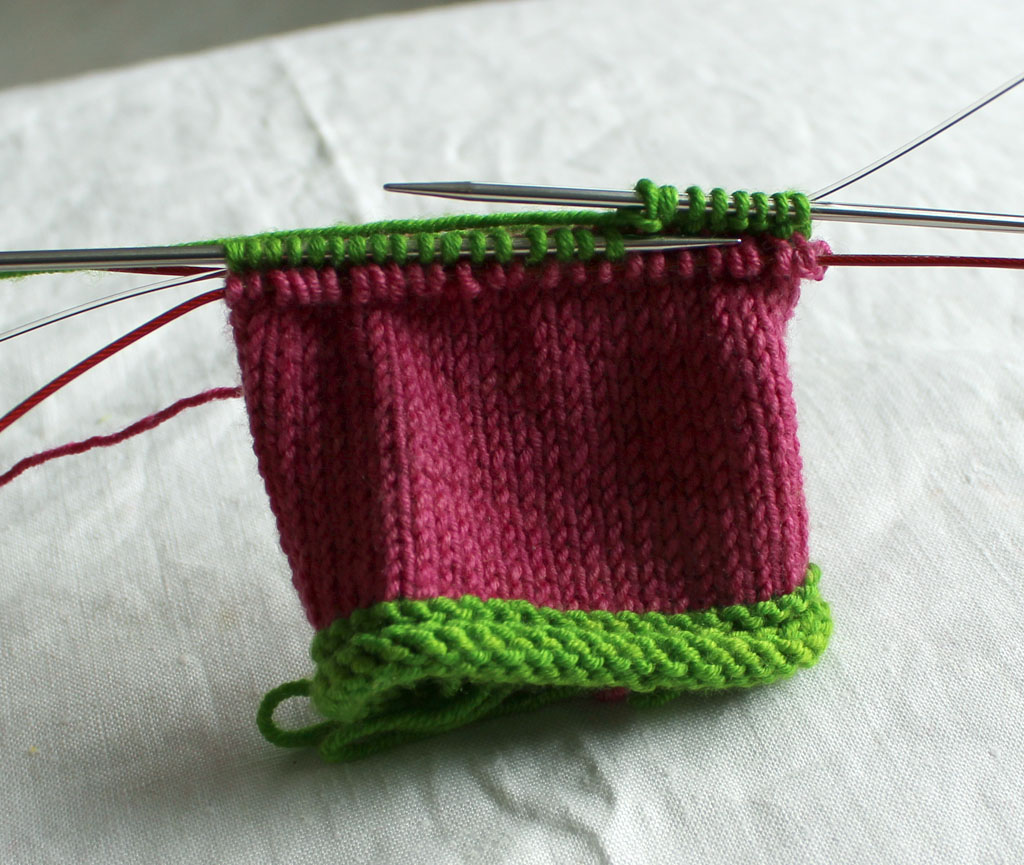
1. Knit sleeve to about 4 cm before finished length.
(In the photos we obviously don’t have sleeve, only a small tube that is standing in for a sleeve.)
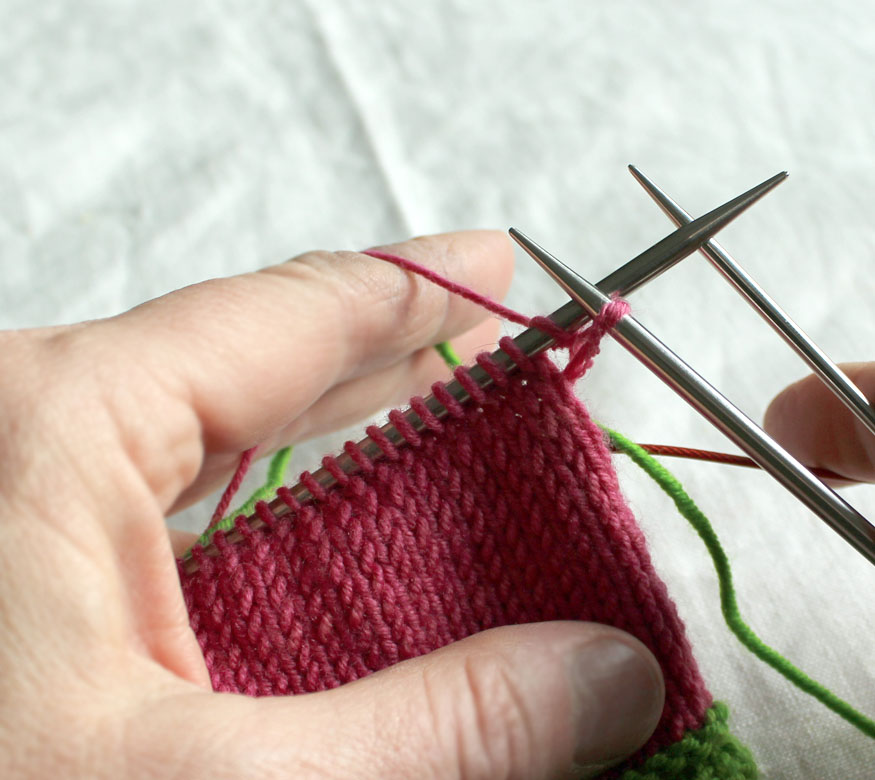
2. With MC and large needle knit into front leg and leave the stitch on needle.
3. With CC1 and small needle knit into back leg and slip stitch off needle.
NOTE: It’s much easier to at this point work with only MC (I don’t know what got into me… except two colours show better what’s what in the photos).
If working this round with only MC, just alternate between knitting into front leg with large needle and back leg with small needle, stitch by stitch all the way around. Then join CC1 for the first ribbing round (Photo 8).
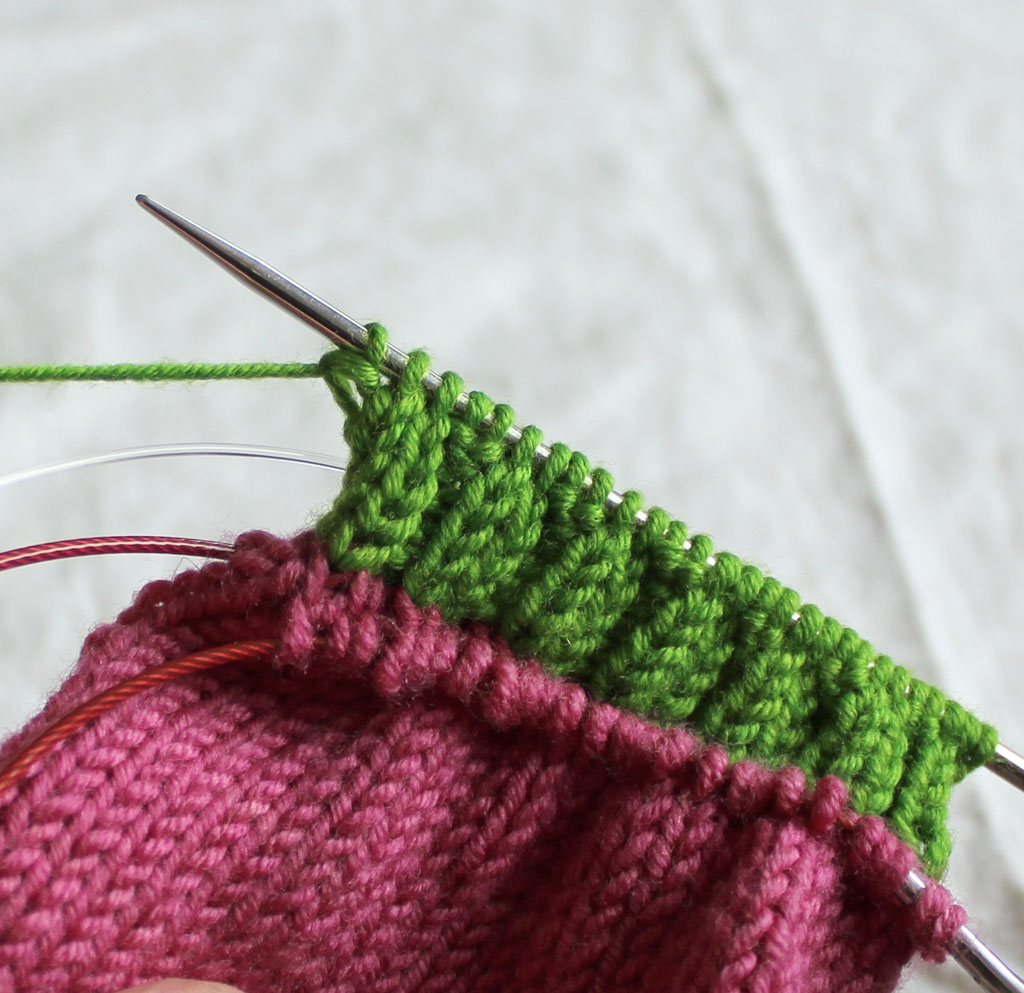
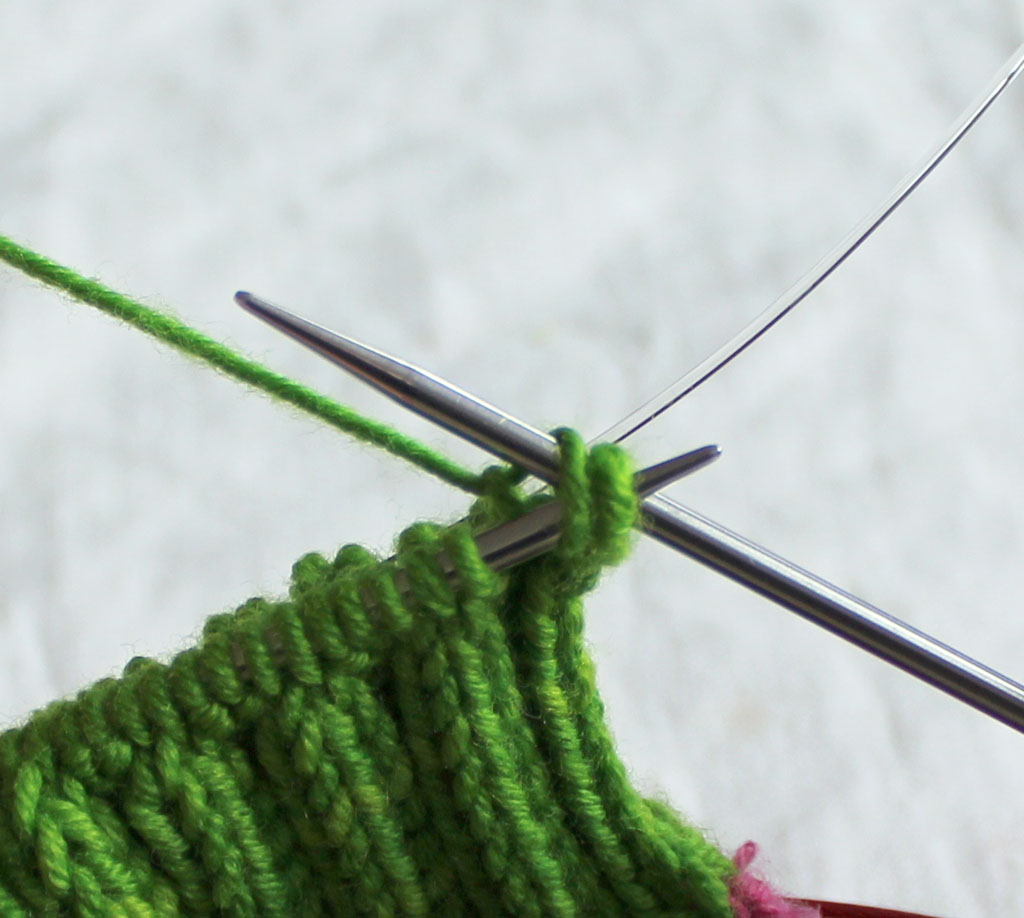
4. Closer view of knitting into front leg with large needle (keep the small needle parallel with large) and leave stitch on needle.
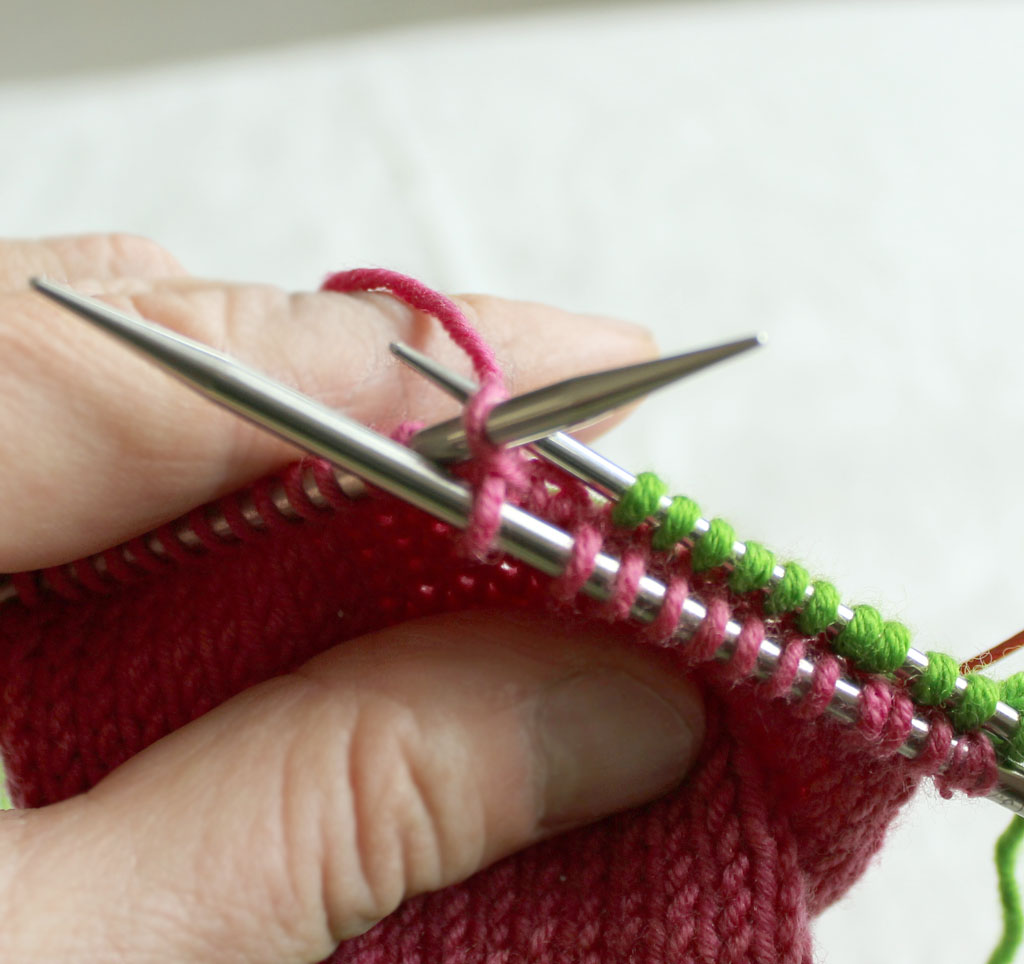
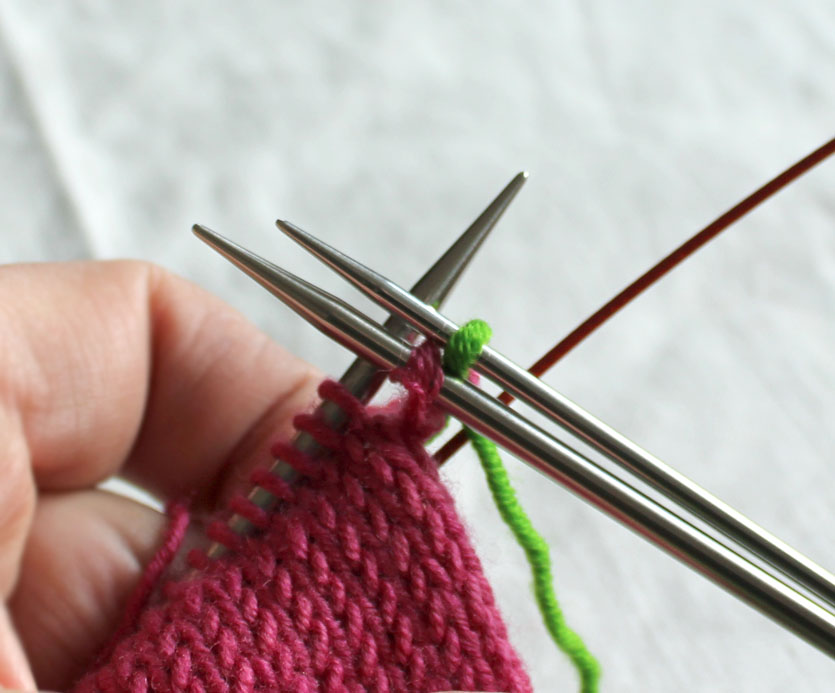
5. Closer view of knitting into back leg with small needle. Here needle has been inserted into back leg – then CC1 (green) is fetched and pulled through….
Tip: it helps to pull the large tip out a bit before working the back leg with small needle. This way the pink stitches don’t accidentally slip off the needle.
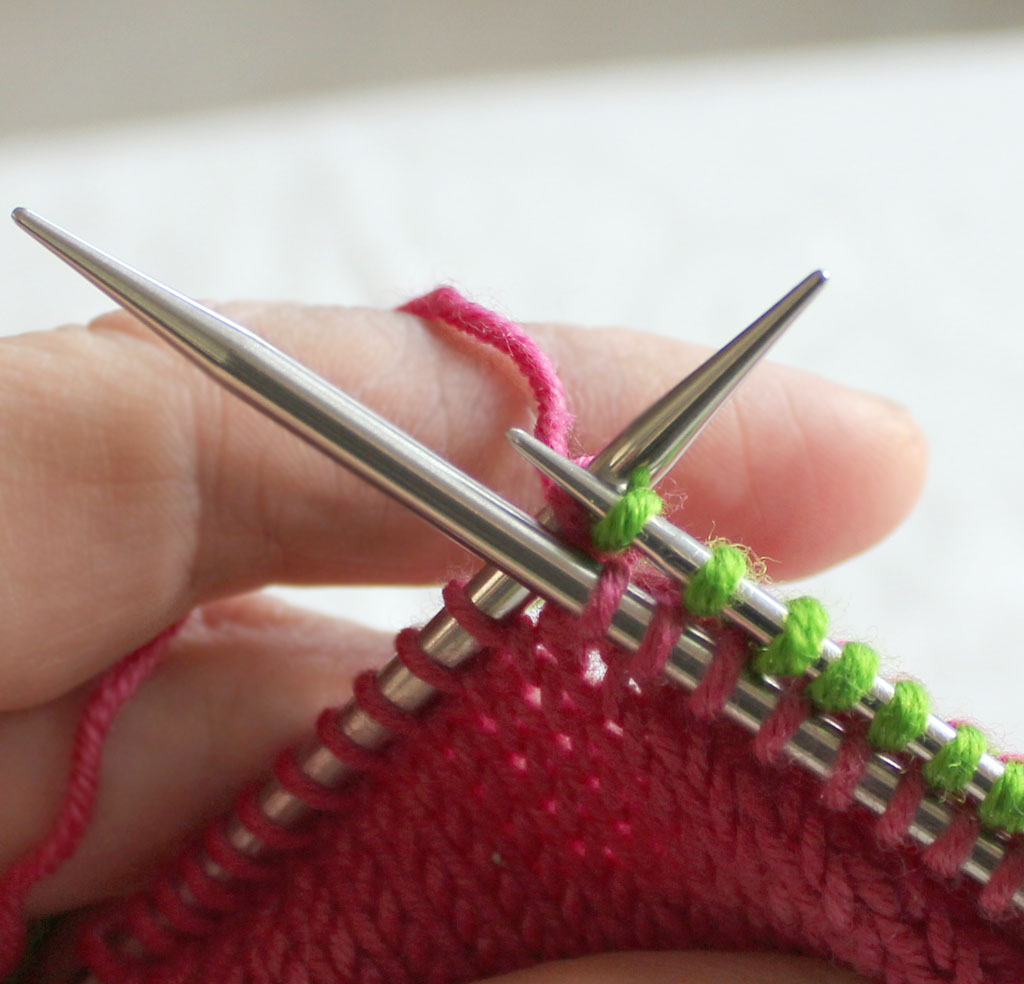 5b. Closer view of knitting into back leg with small needle and CC1.

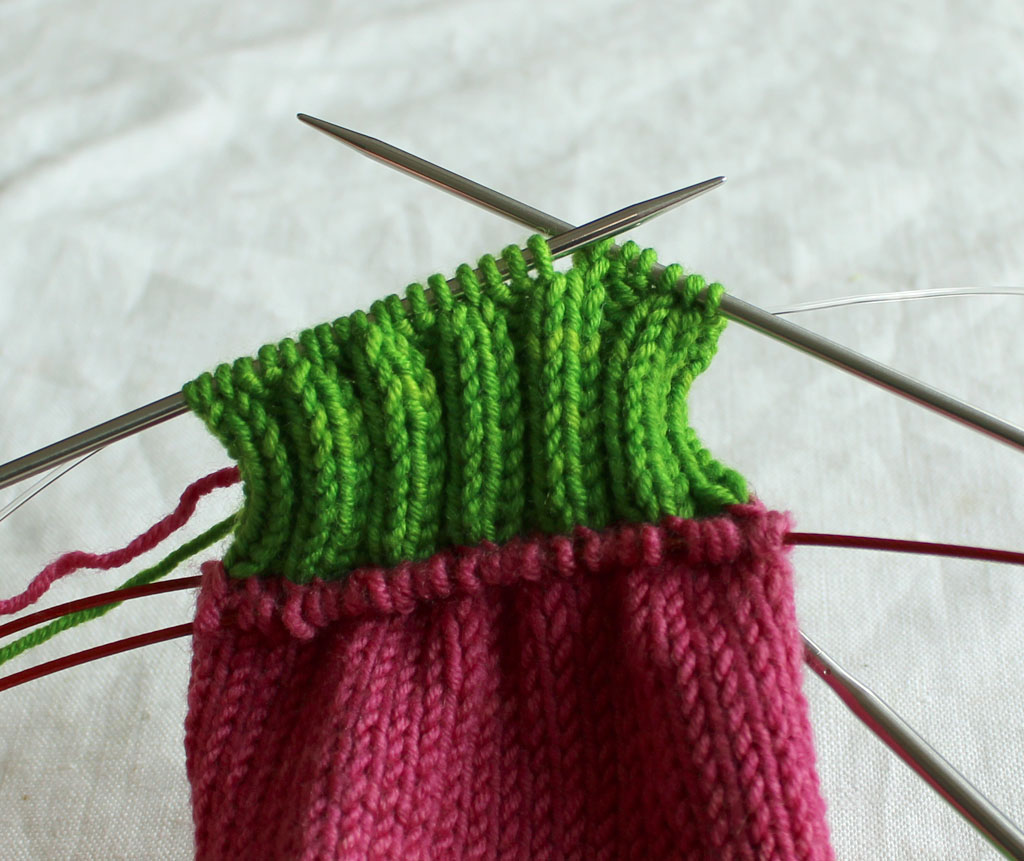
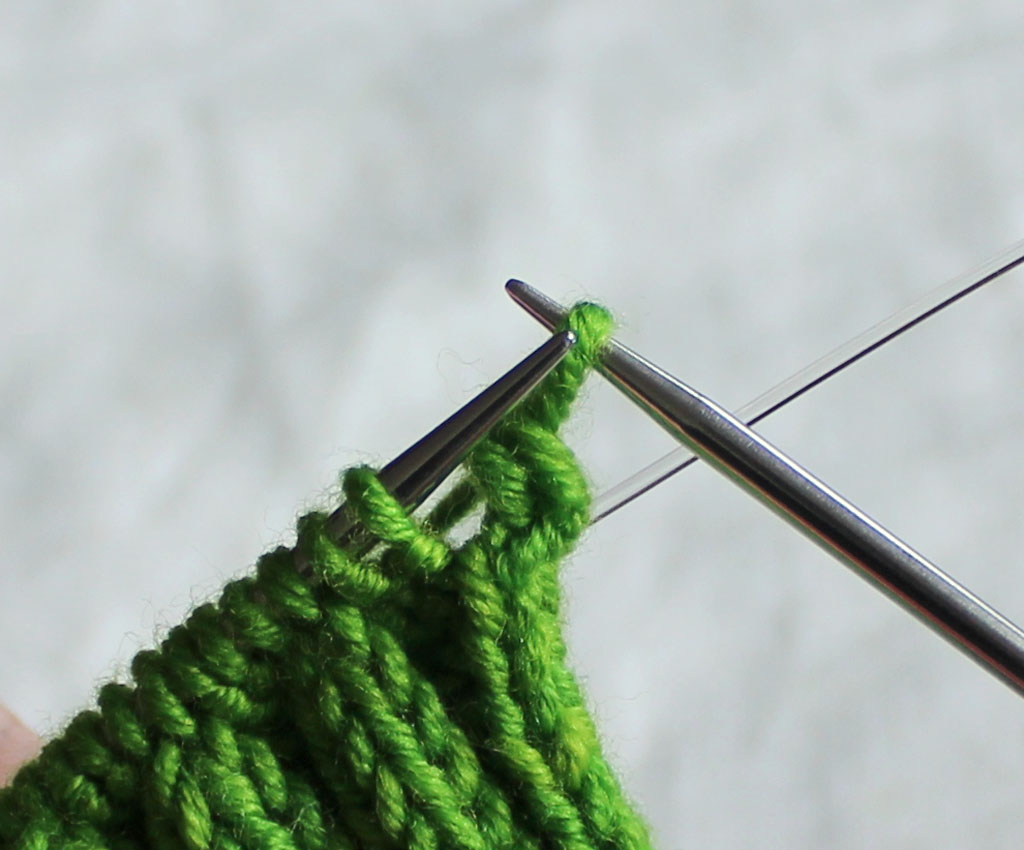
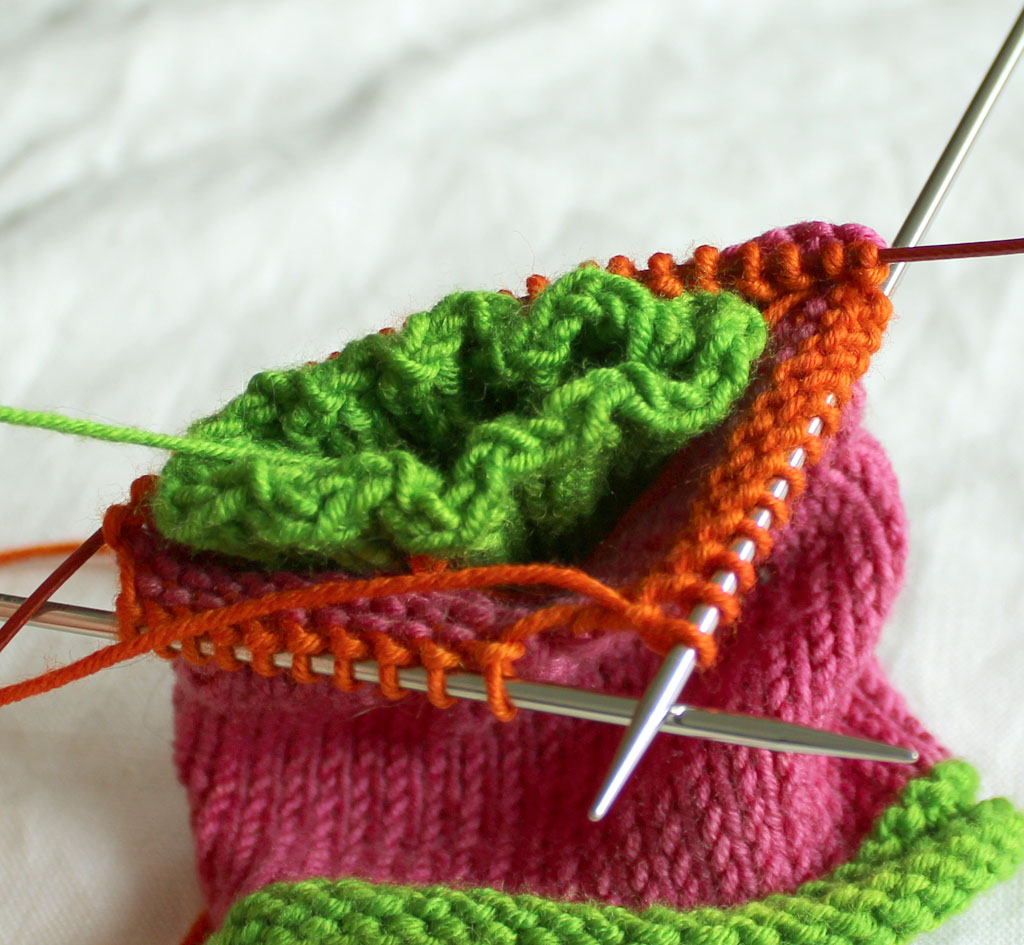
6. Half a round of kfb done. Time to loop the cables and work the other half.
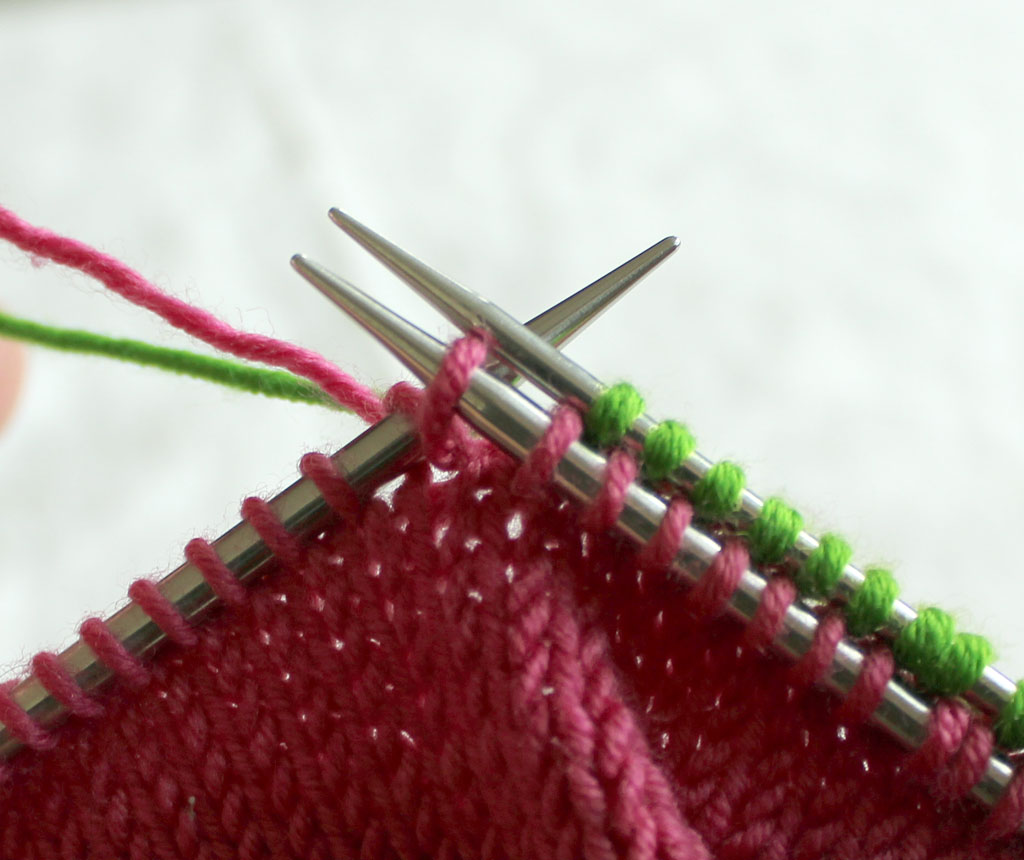
7. The round of kfb is complete.
The small needle with CC1 (green) stitches sits inside the large needle with MC (pink) stitches.
Pull on both tips to loop cables.
Then leave the large needle hanging – and make sure the MC (pink) yarn is left hanging on the outside.
For now you’ll work with only the small needle and the CC1 (green) stitches.
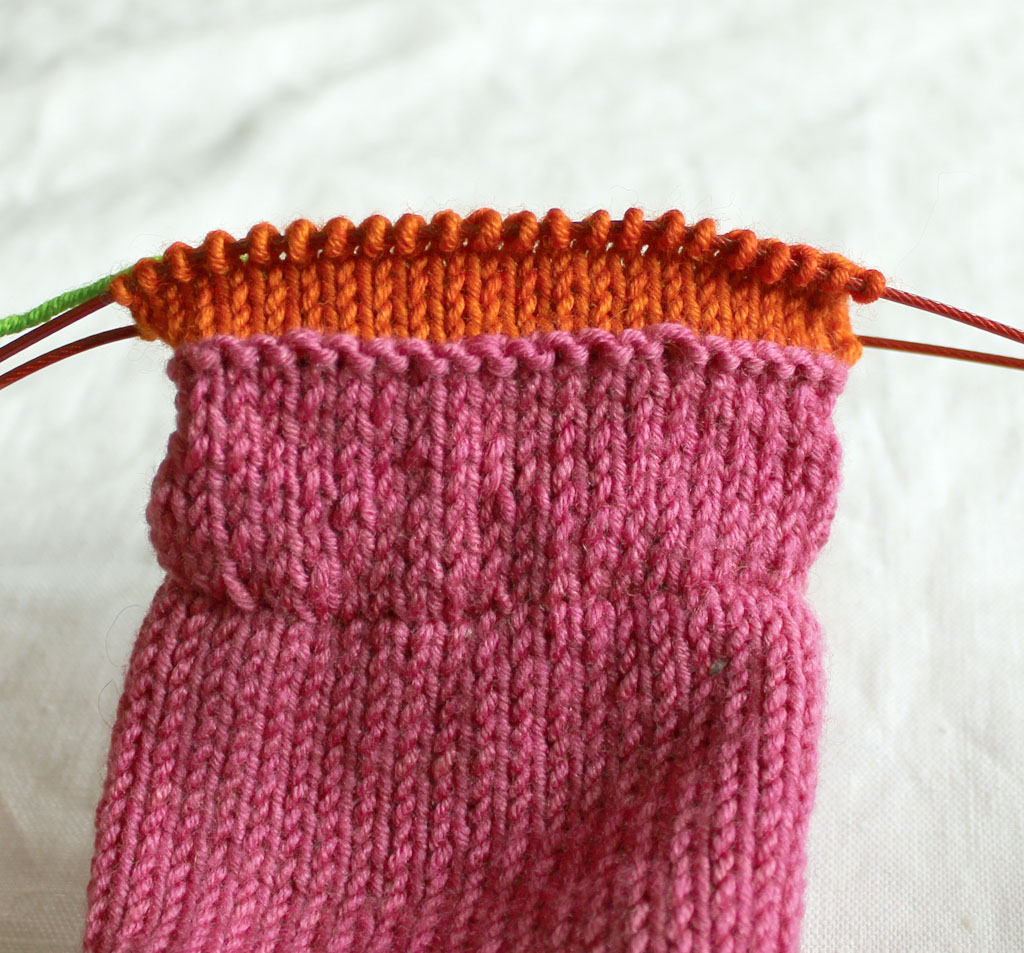
8. With CC1 (green) work a 2 x 2 rib for 3.5 cm (1 1/2 in) or for as long as you like.
If your stitches are not divisible by 4 (for the 2 x2 rib) , decrease 1–2 stitches (or increase 1 stitch) along the first round to get a number that works.
9. A tip: I like to loop between 2 purled stitches – so the last stitch and the first stitch is always a purled stitch.
This helps to diminish any tendencies to ladders. That said, with these slim, flexible cables (ChiaoGoo) that’s not really an issue.
10. Ribbing is almost done.
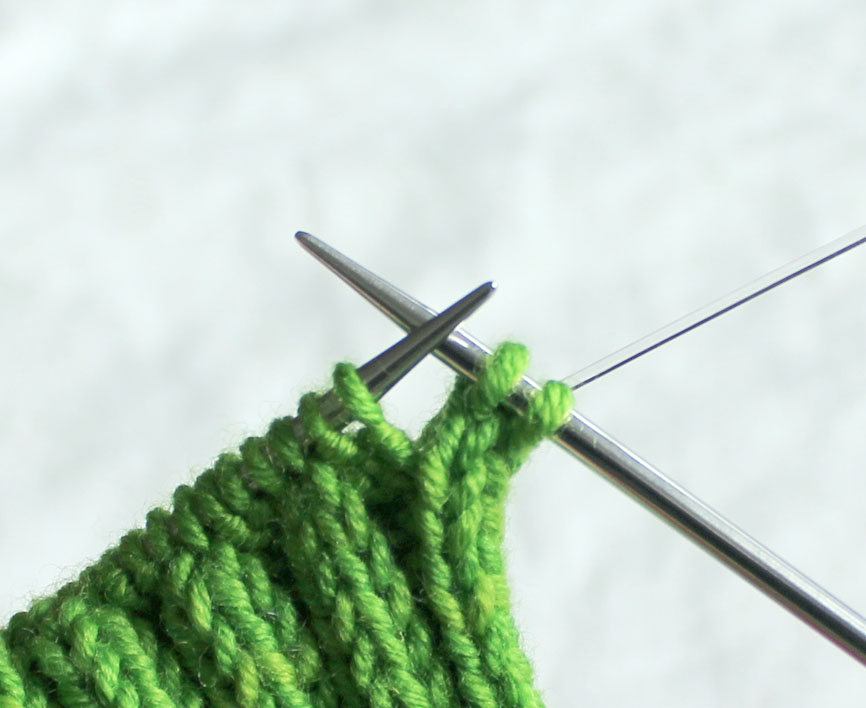
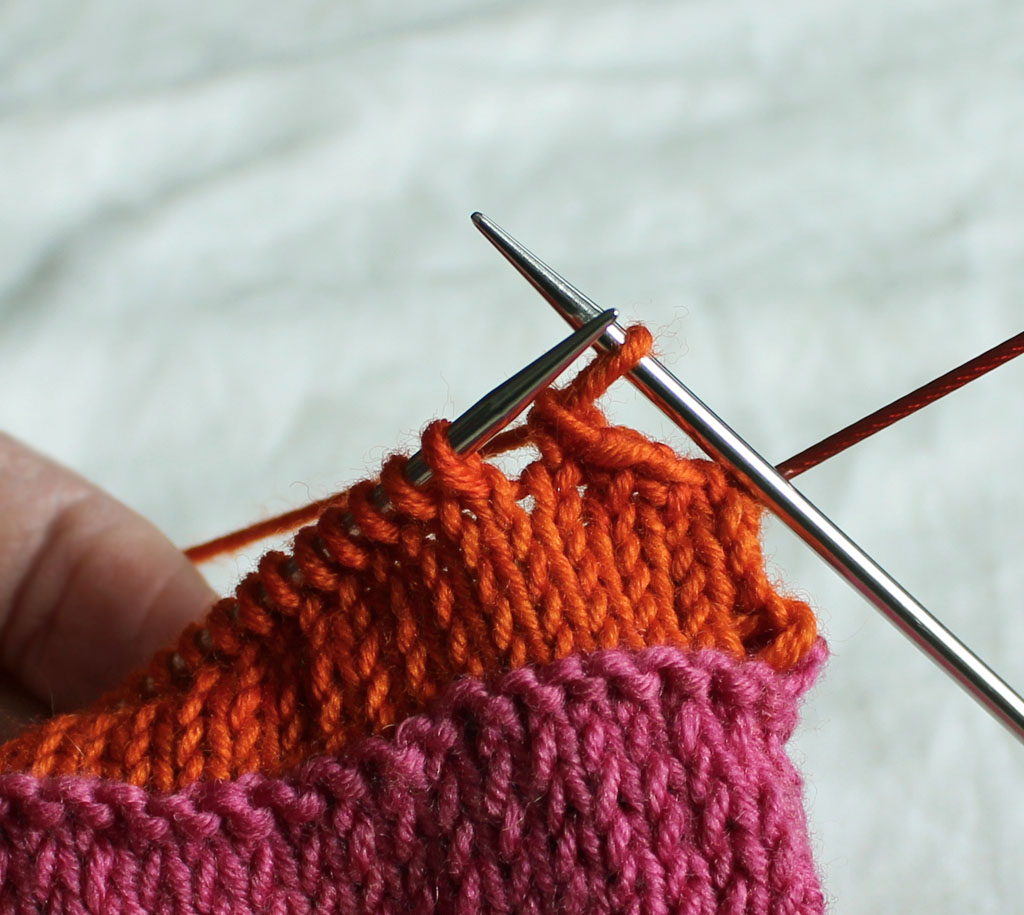
11. Time to cast off in rib with a stretchy cast off.
K2, insert Left Needle into the 2 stitches on Right Needle in order to knit them through the back loop.
P1, insert, Left Needle into the 2 stitches on the Right Needle, knit them through the back loop.
P1, insert Left Needle into the 2 stitches on the Right Needle, knit them through the back loop
K1, insert Left Needle… and so on.
(Always work the next stitch in set rib pattern – if it’s a knit stitch knit it, if it’s a purl stitch purl it.
Then knit the 2 stitches on Right Needle through the back loop.)
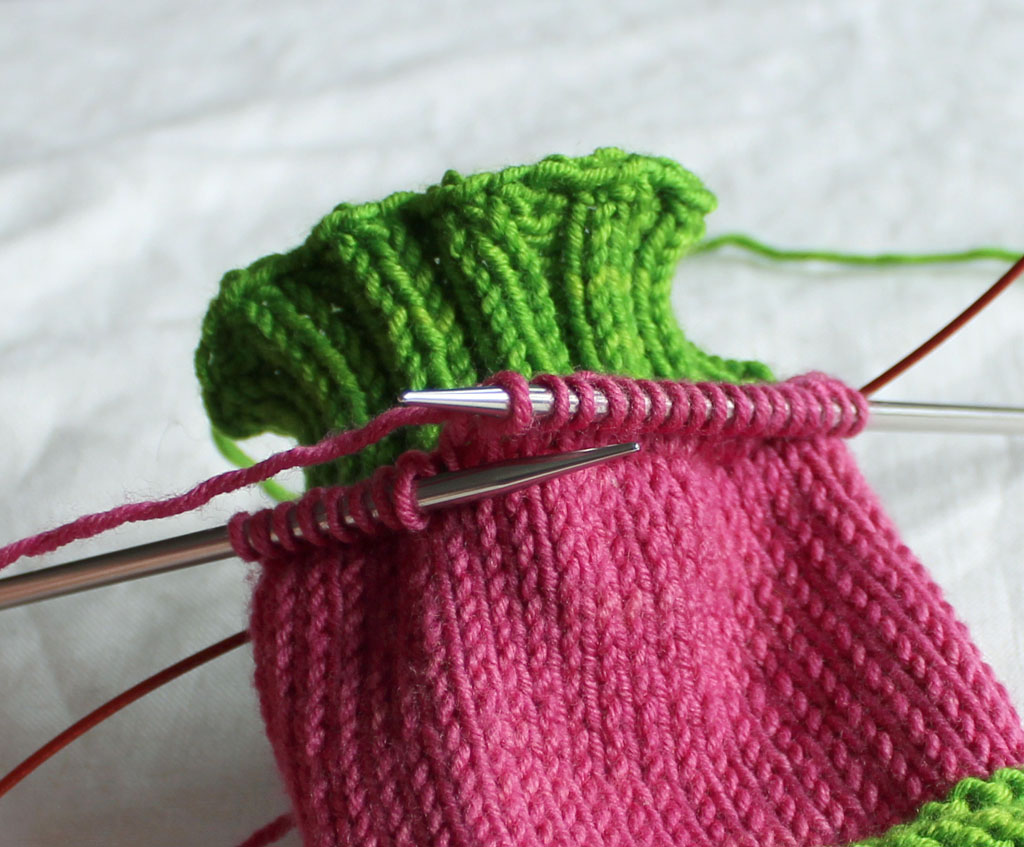
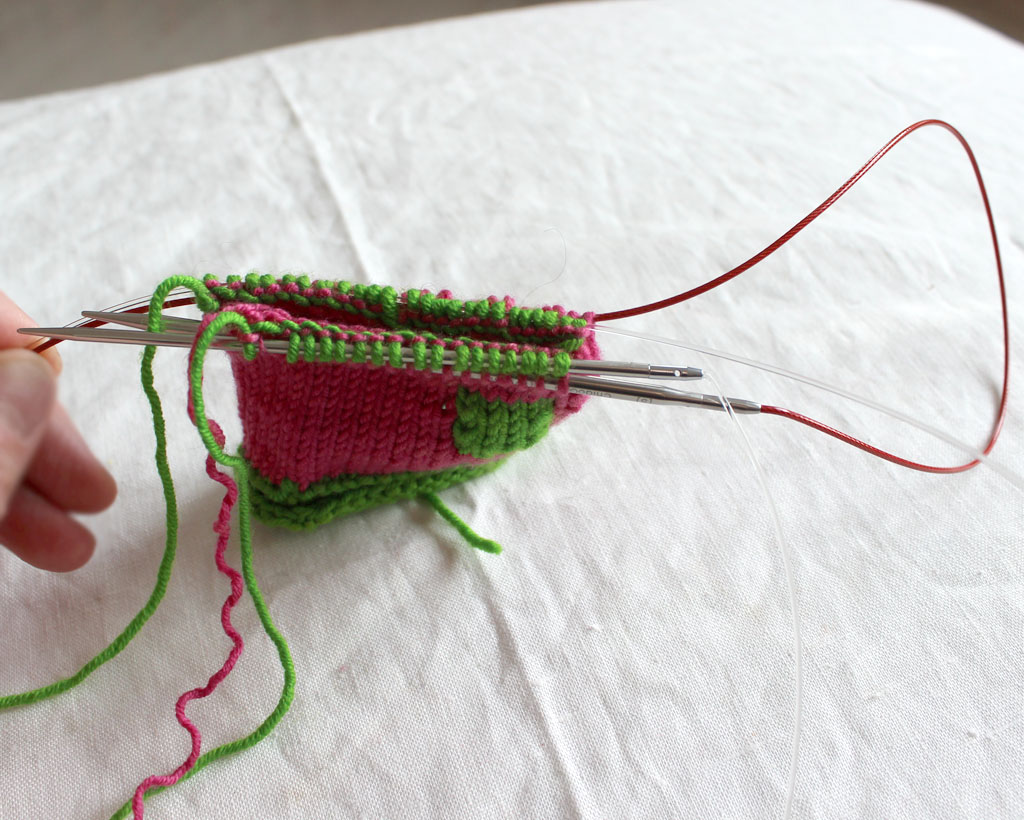
12. Finish the (outer) sleeve.
Knit MC (pink) sleeve stitches up around the ribbed cuff. Work to a little shorter than the rib (Unless you want a completely hidden inner rib, then knit a bit further).
Tip: if you are working with interchangeable needles, switch to a smaller Left Tip – it makes the stitches slide more easily when looping.
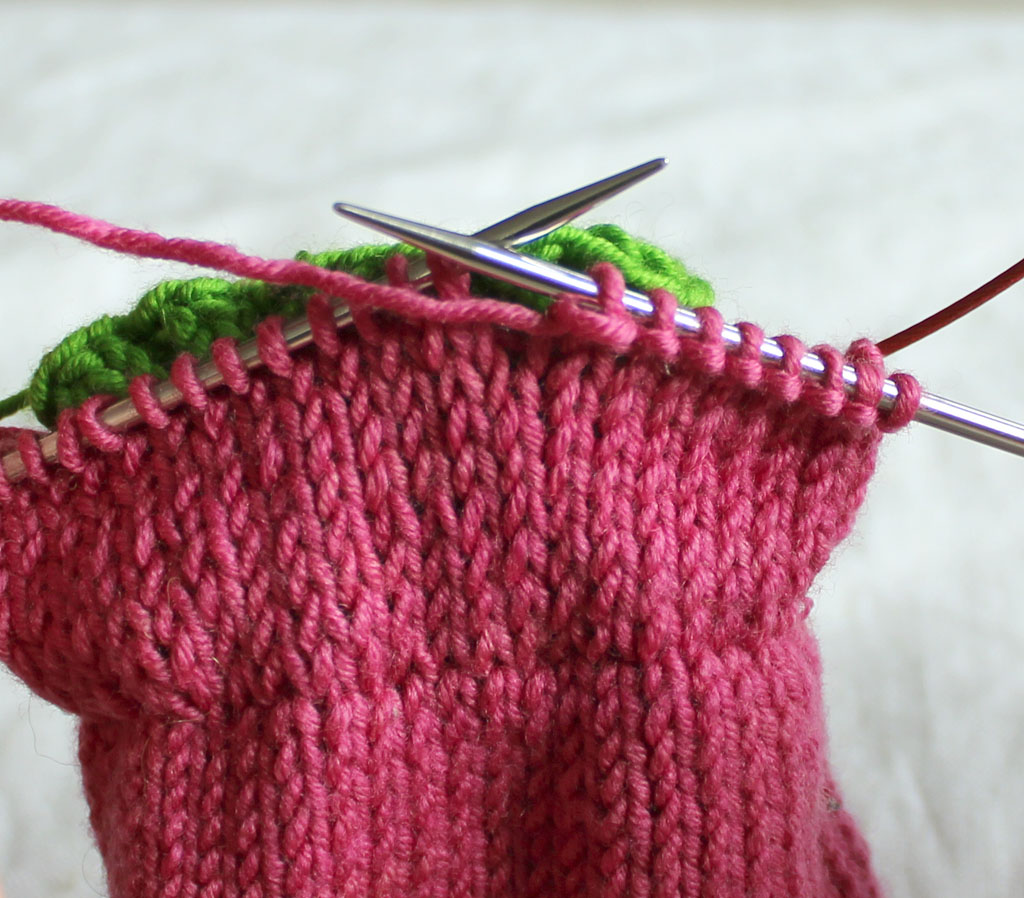
13. Switch to small needle, purl one round.
14. With CC2 (and small needle) knit 6 rounds for a rolled cuff hem.
15. Rolled CC2 hem is done.
16. Cast off also the rolled hem with the stretchy cast off used to cast off the rib above:
K1, *k1, sl2 to LN, k2togtbl* to end.
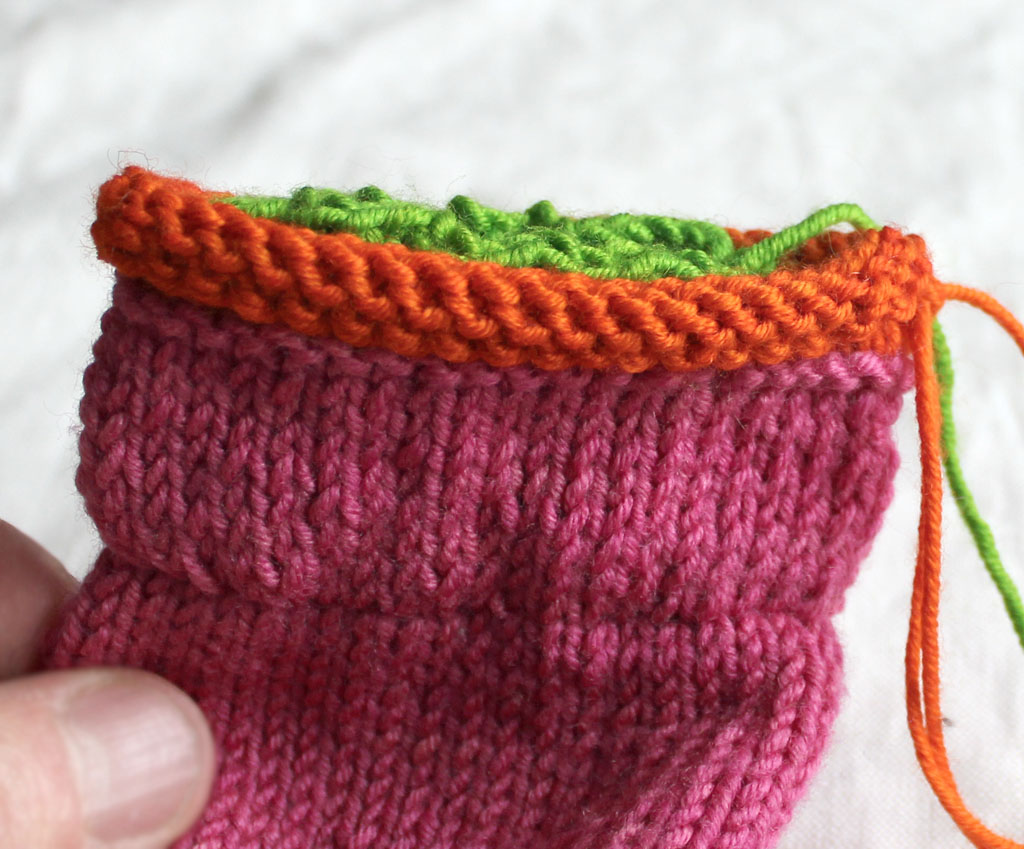

Done!
Want to know what else is up my knitted sleeve? Sign up for the occasional Åsa Tricosa Newsletter.

4 Comments
Thanks, I love all of your tips/techniques. I have tons saved…….are “we” writing a book yet?
my best…..
Thank you! And yes, ‘we’ are. How are you coming along on the intro, then… ? 😉 Happy New Year to you, Connie!
Really interesting. Perfect explanation. I love your “how to”.
Thank you, I was trying to work out how to add two different coloured cuffs to my top down sleeve.