(sort of) intarsia in the round
I like knitting in the round. I like colour blips. I like the two together.
But intarsia does not work well in the round…
So this is how I do it.
The instructions below are specifically for the coloured squares in my Sweatrrr. If you are working with larger colour insertions, you’ll obviously need a longer piece of Contrast Colour, and to be a little inventive.
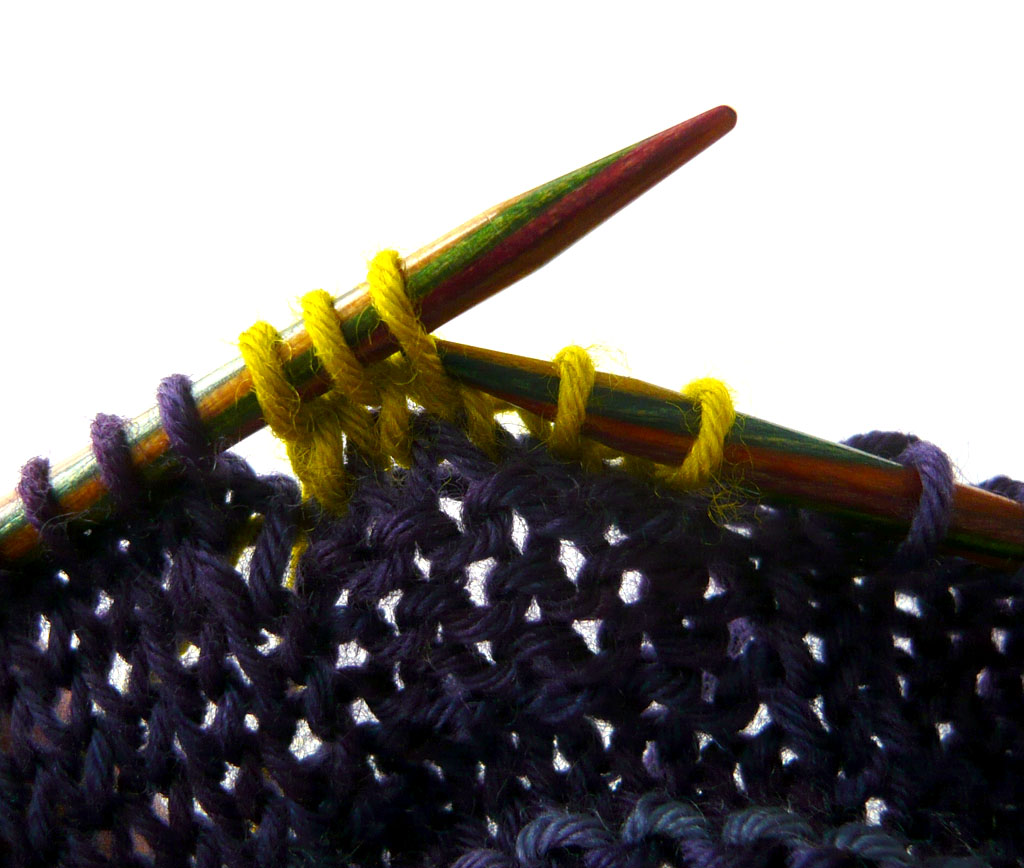
Round 1: Cut a 55-60 cm (22″) piece of Contrast Colour (CC) yarn, attach and knit 5 stitches, but leave a 20 cm (7″) end at the beginning.
You will knit the 5 CC stitches in Round 2 with this end.
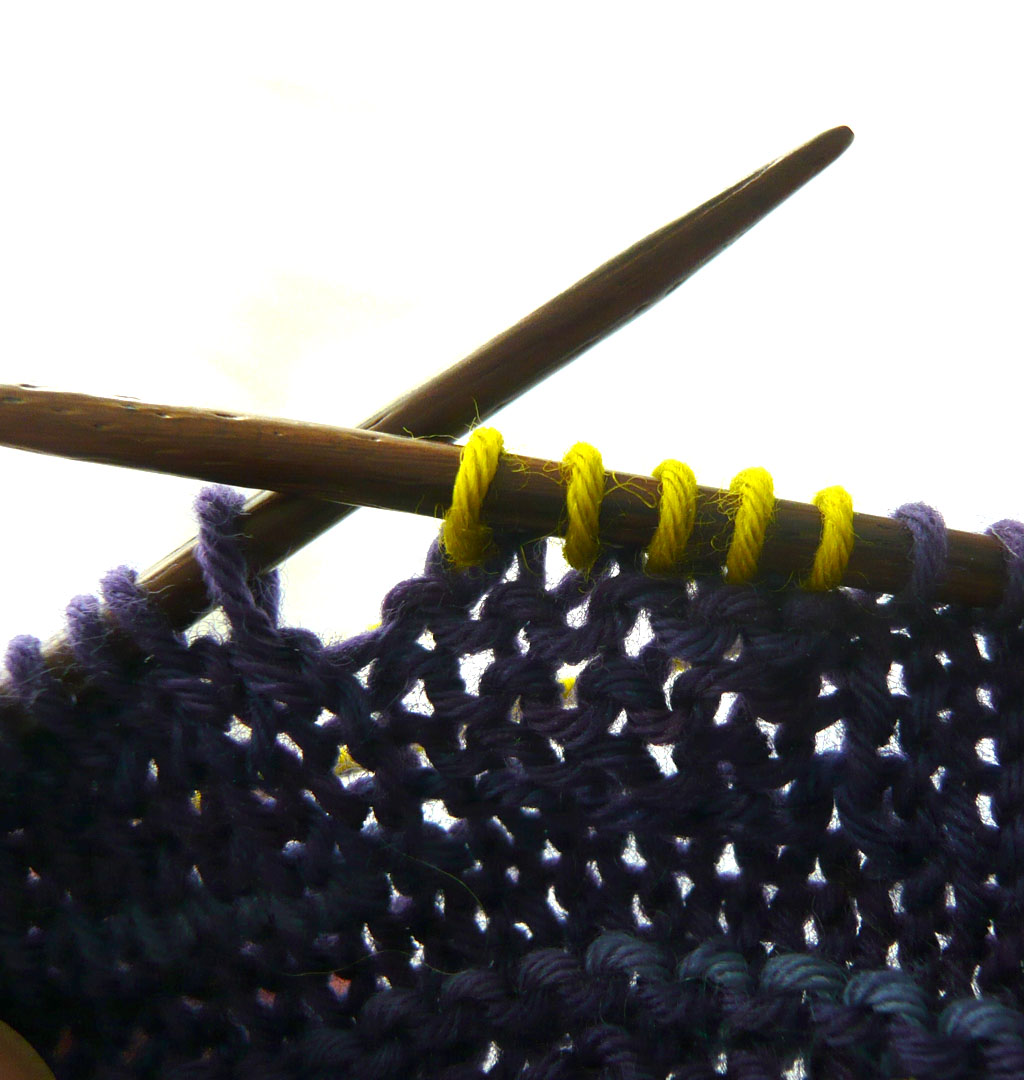
5 CC stitches knitted on Round 1. Not a bad start.
Now strand the Main Colour (MC) behind, not too loosely, not too tightly either, then twist MC around CC, and pull MC tight at the beginning of the 5 CC stitches — pull and stretch the fabric to see that the yarn is not pulled too tightly, check, fiddle a little.
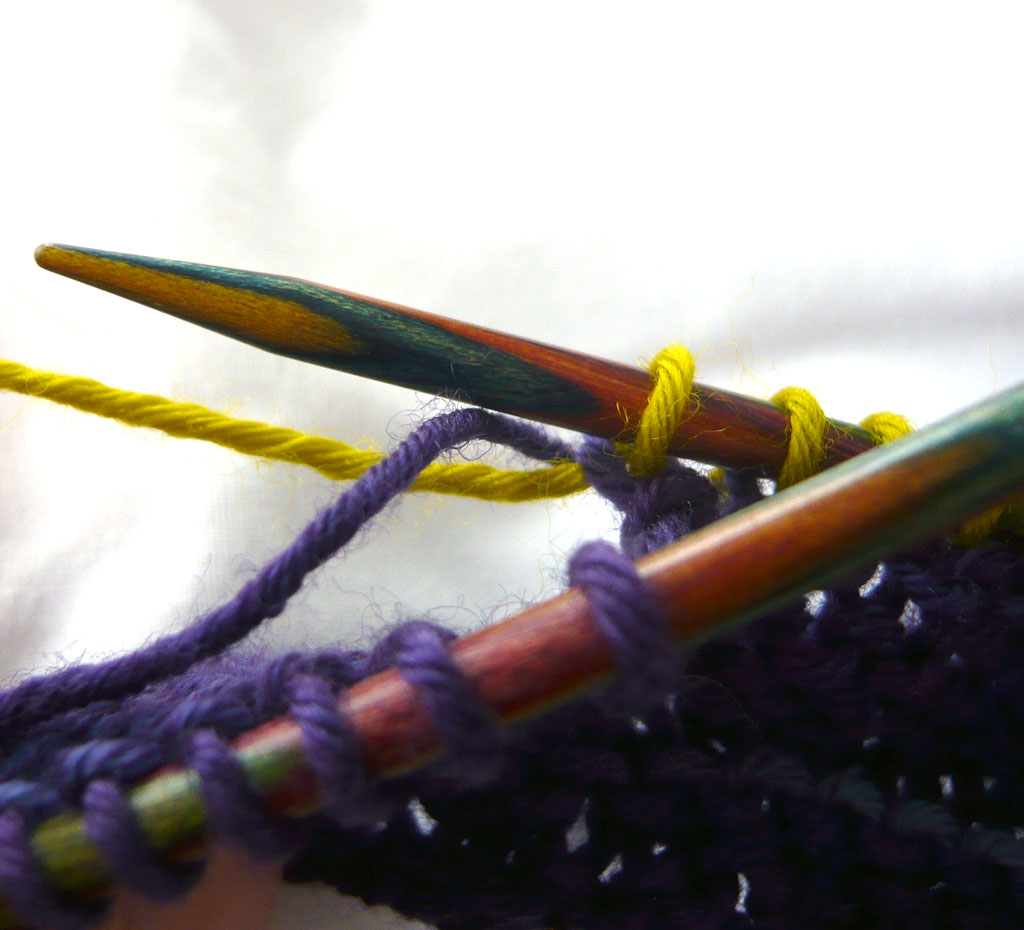
Securing the yarns — in normal intarsia knitting, the securing would be complete here (new yarn is brought from below and around old).

Completing the twist to continue knitting with the purple (MC) yarn.
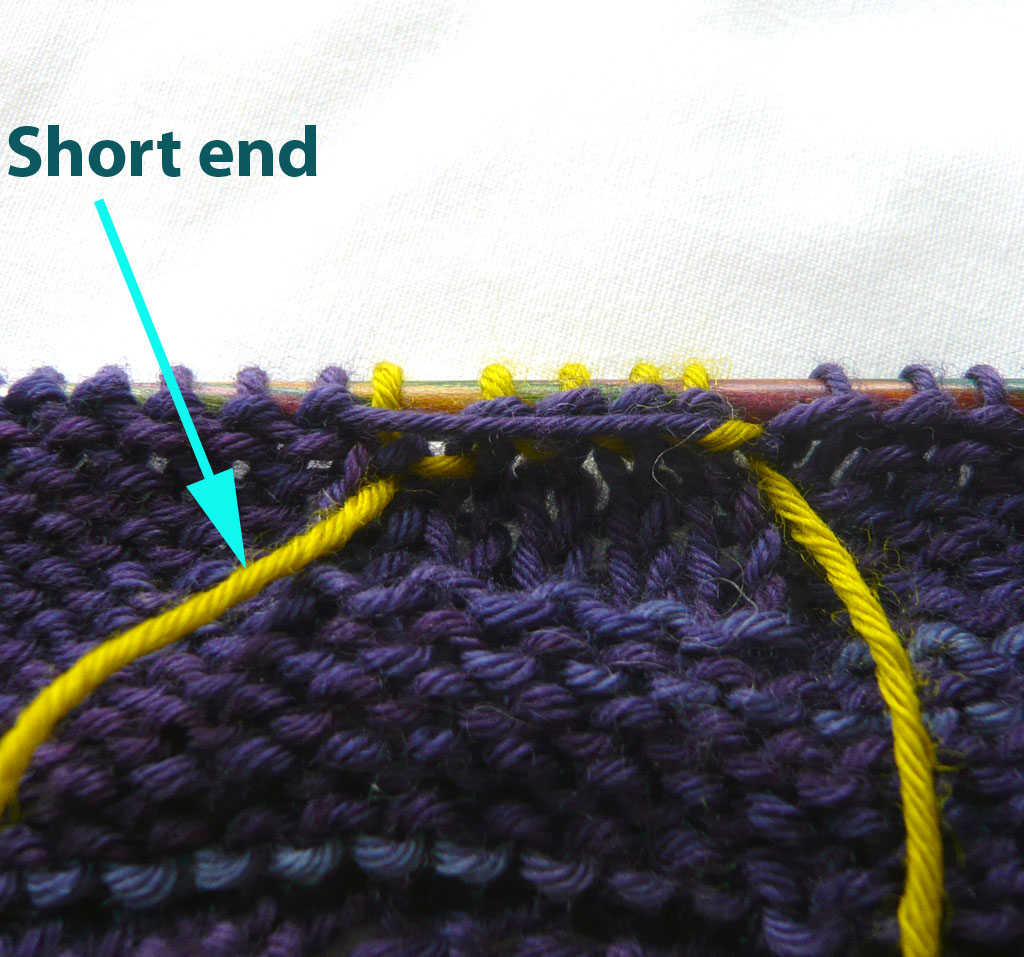
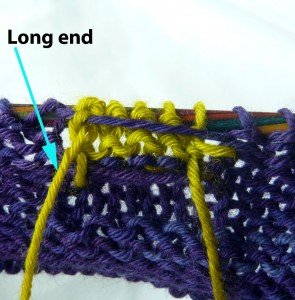
View from Wrong Side (WS) after Round 1. The arrow points at the short yarn end which will become the working yarn in Round 2. The purple yarn is stranded comfortably – not too tightly, not too loosely.
Round 2: Knit 5 CC stitches with the short yarn end from previous round.
Now strand MC behind and twist it with the long end of CC (from Round 1).
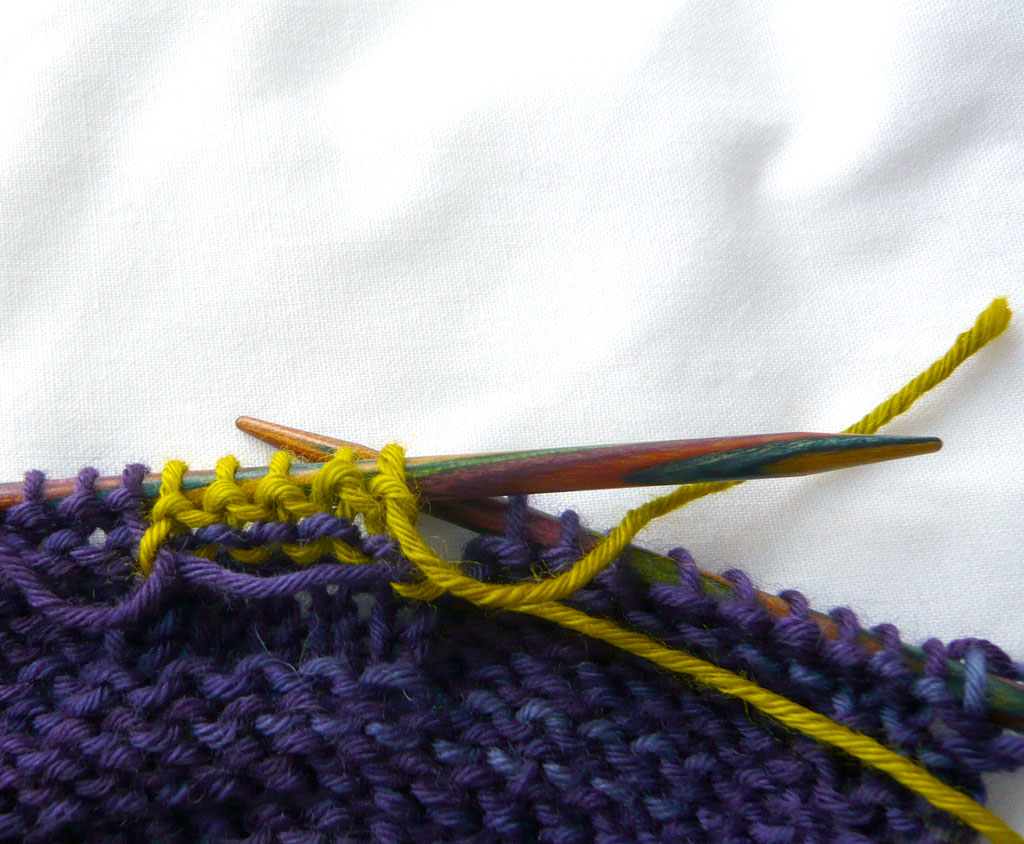
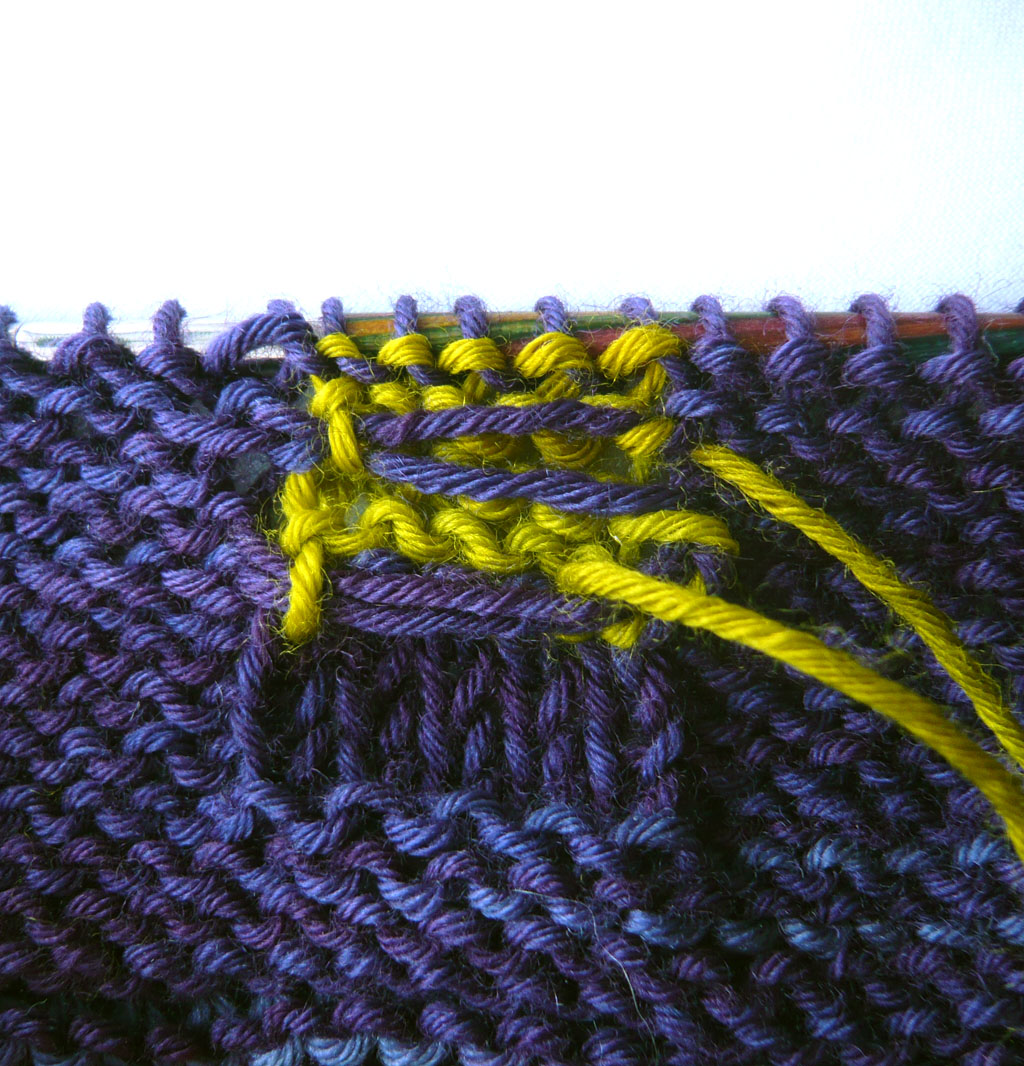
View from WS after Round 2 (worked from the Right Side) – both yarn ends are on the far side of the square. On Round 3, you will purl back with the long yarn end – the bottom yarn in photo.
Round 3: This is the odd-one-out round.
Slip the 5 CC stitches without knitting them from Left Needle to Right Needle. Turn work over to work from WS, purl the 5 CC stitches with the long yarn end from Round 1.
Slipping 5 CC stitches from Left Needle to Right Needle – so that they can be worked (purled) from the WS.
View from Wrong Side (WS) after Round 3. The arrow points at the long yarn end. The purple (MC) yarn is still stranded comfortably – not too tightly, not too loosely (and you can see how it has been secured with the CC long yarn end).
Turn work back to RS and again slip the 5 CC stitches from Left Needle to Right Needle.
Twist MC with CC, strand MC behind, continue with MC as before.
Round 4: Knit the 5 CC stitches with the long yarn end (which is just where you want it), lay CC over MC, bring up MC from below and around and continue with MC.
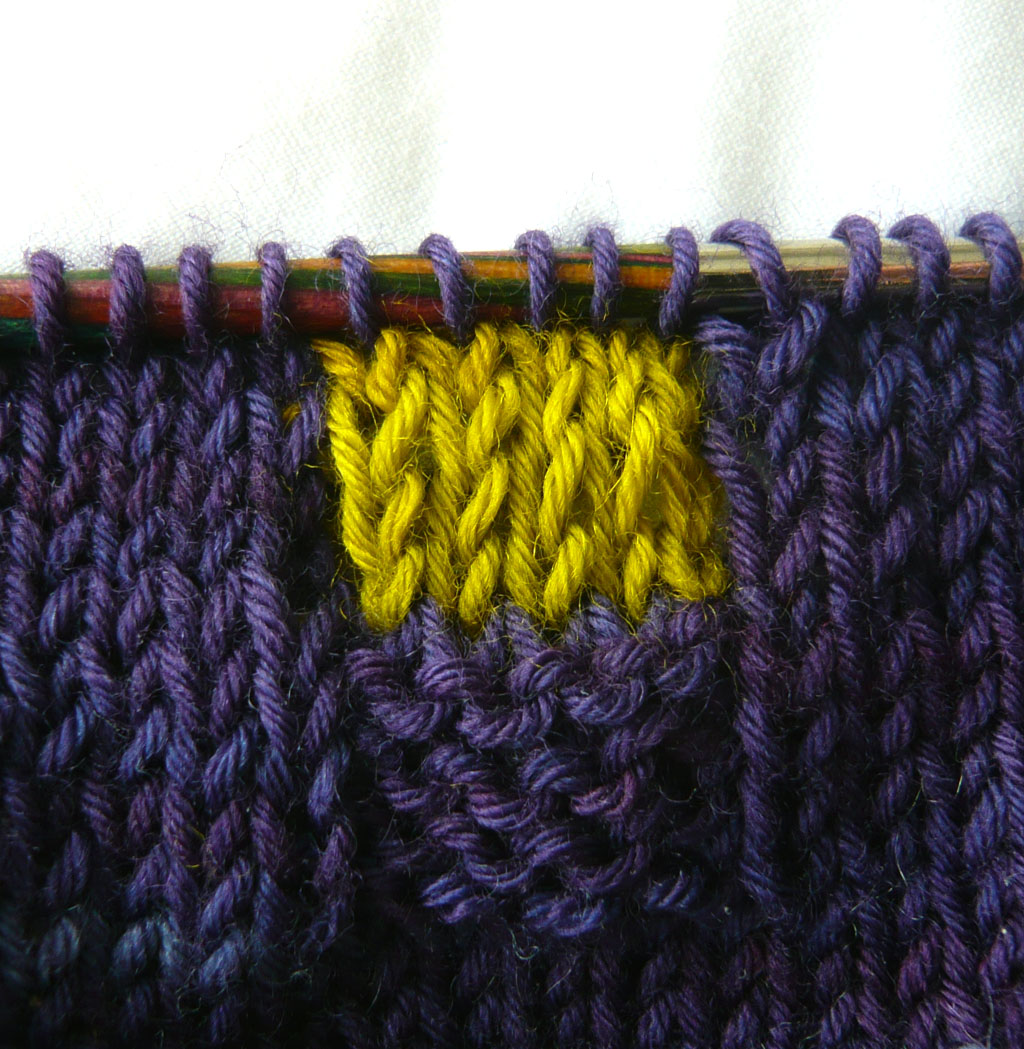
The coloured square is complete – and one more round has been knitted above it.
The completed square viewed from WS.
Done.
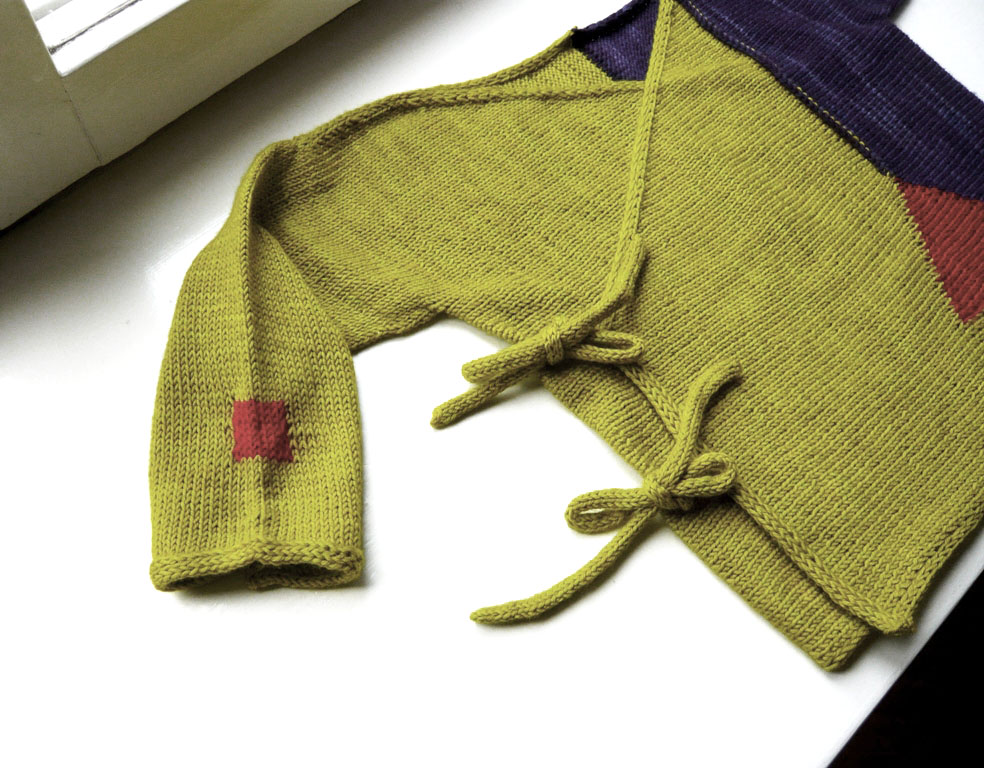
I used a similar technique — but improvised and not very methodical — for a larger, red square on my marja-stina kiddie kimono:
Want to know what’s up my knitted sleeve? Sign up for the occasional Åsa Tricosa Newsletter.

2 Comments
In your instructions for KAUL Toque STEP 1: Cast on and Crown “Set up Rnd you say K5 (5,6), LOOP
What does LOOP mean
It means: pull on the cable of your circular needle to make a loop – as in magic looping.