moving cable without cable needle
Photo tutorial for the snaking cable on the Io and Mio gloves.

You can use a cable needle but I find it is easier not to.
The instruction below is for a contrasting cable – it doesn’t have to be. Simply ignore the instructions about which yarn goes where if you are knitting with just one colour.
Snaking Left (C2L)
MC = Main Colour (green)
CC = Contrast Colour (purple)
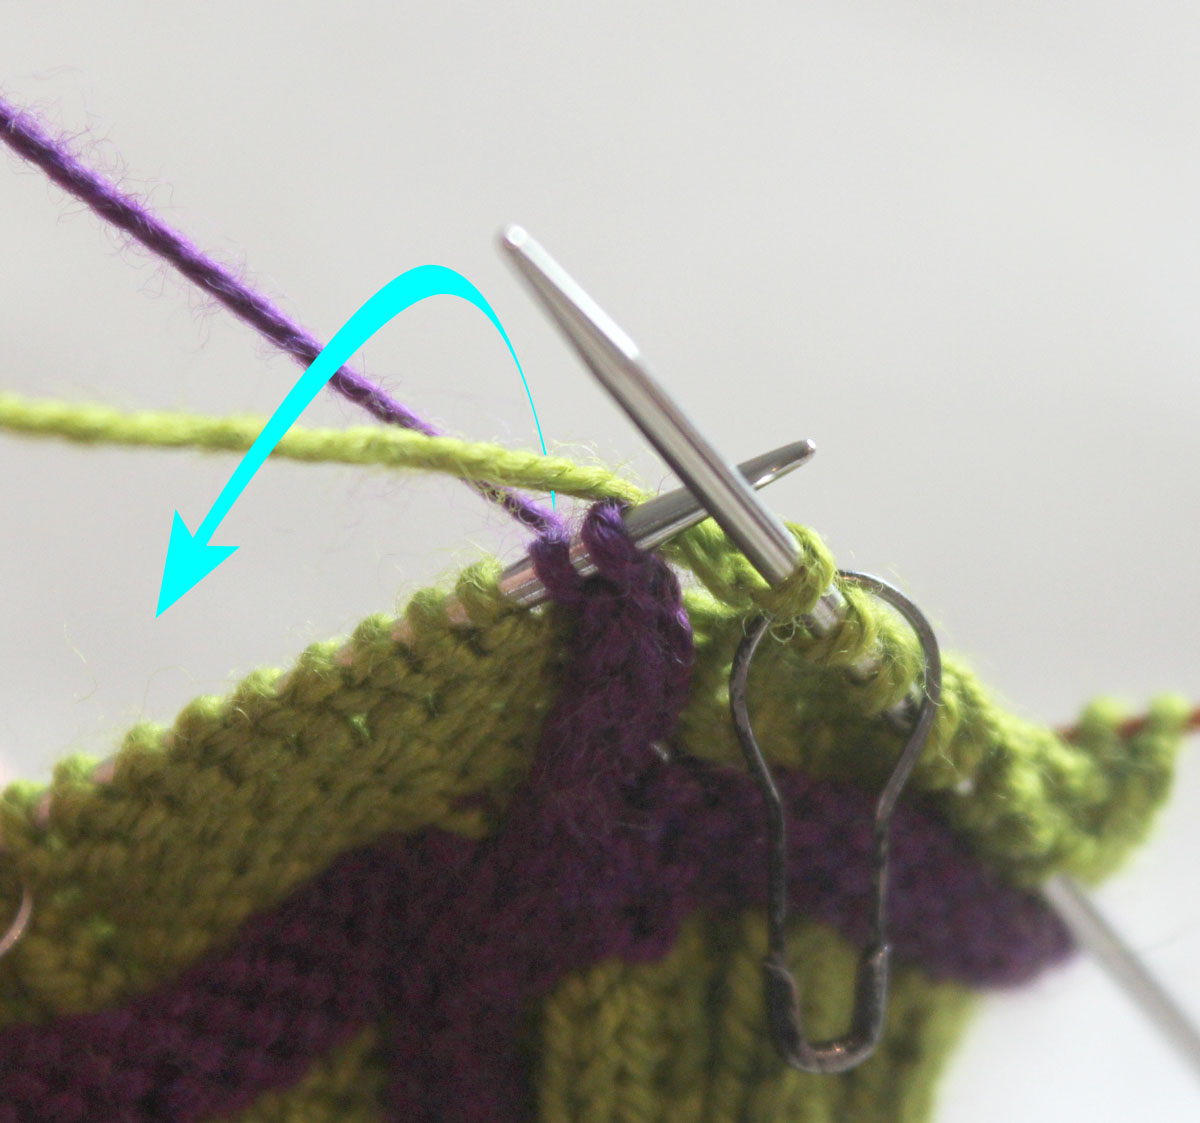
1. Work to cable.
The 2 purple (CC) cable stitches need to travel to the left and in front of the green (MC) stitch.
The green stitch moves to the right of and behind the cable stitches. To make this happen you manipulate the stitches as follows.
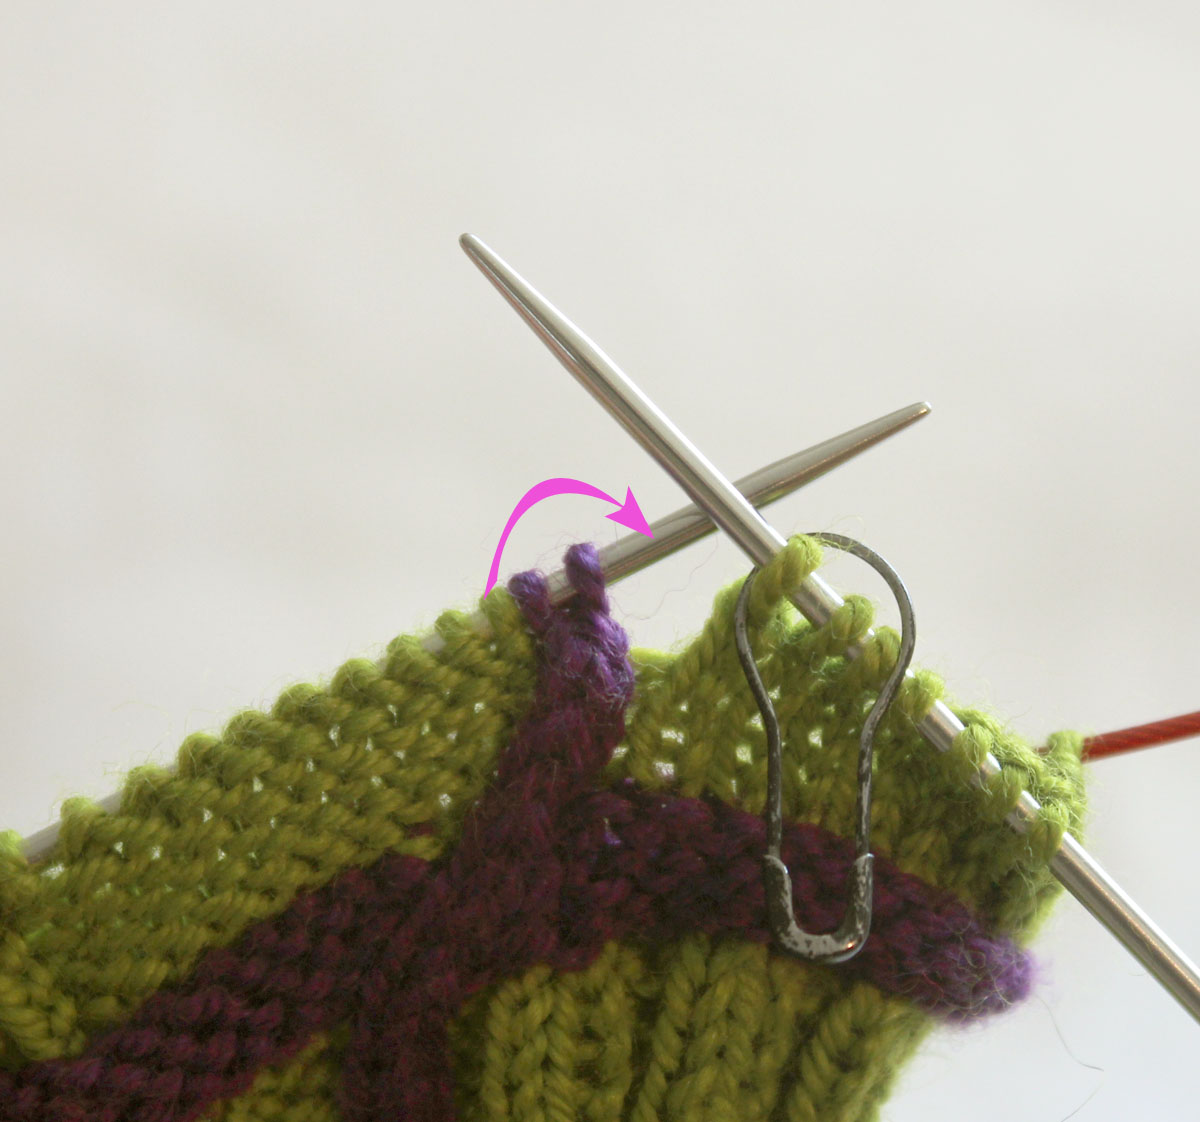
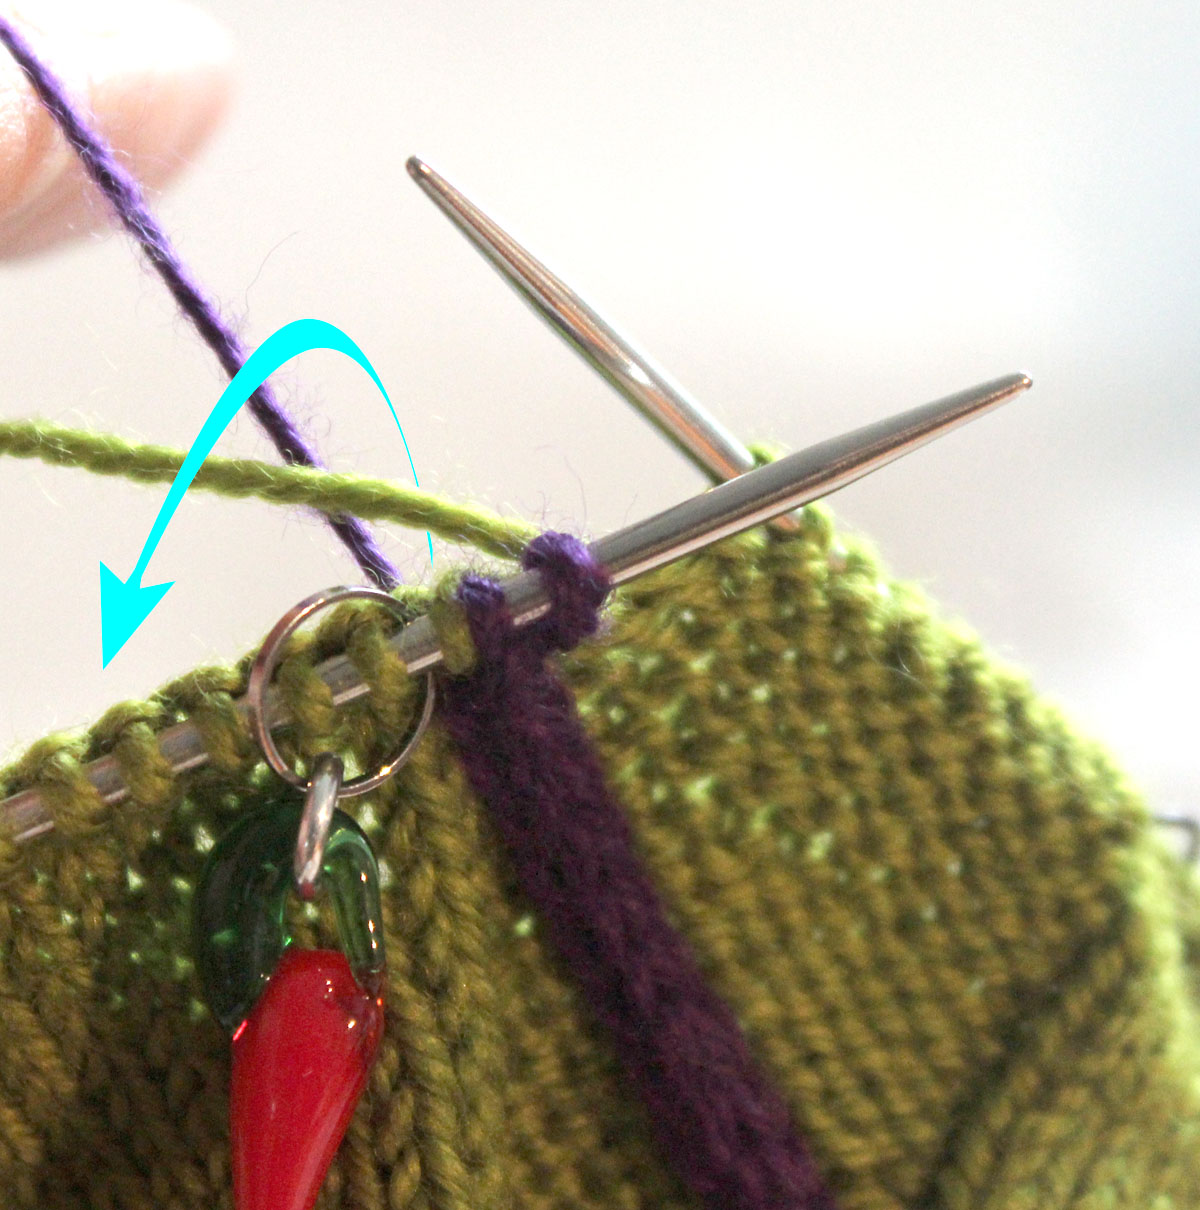
2. Slide 3 stitches (2 cable stitches & the next stitch) to Right Needle.
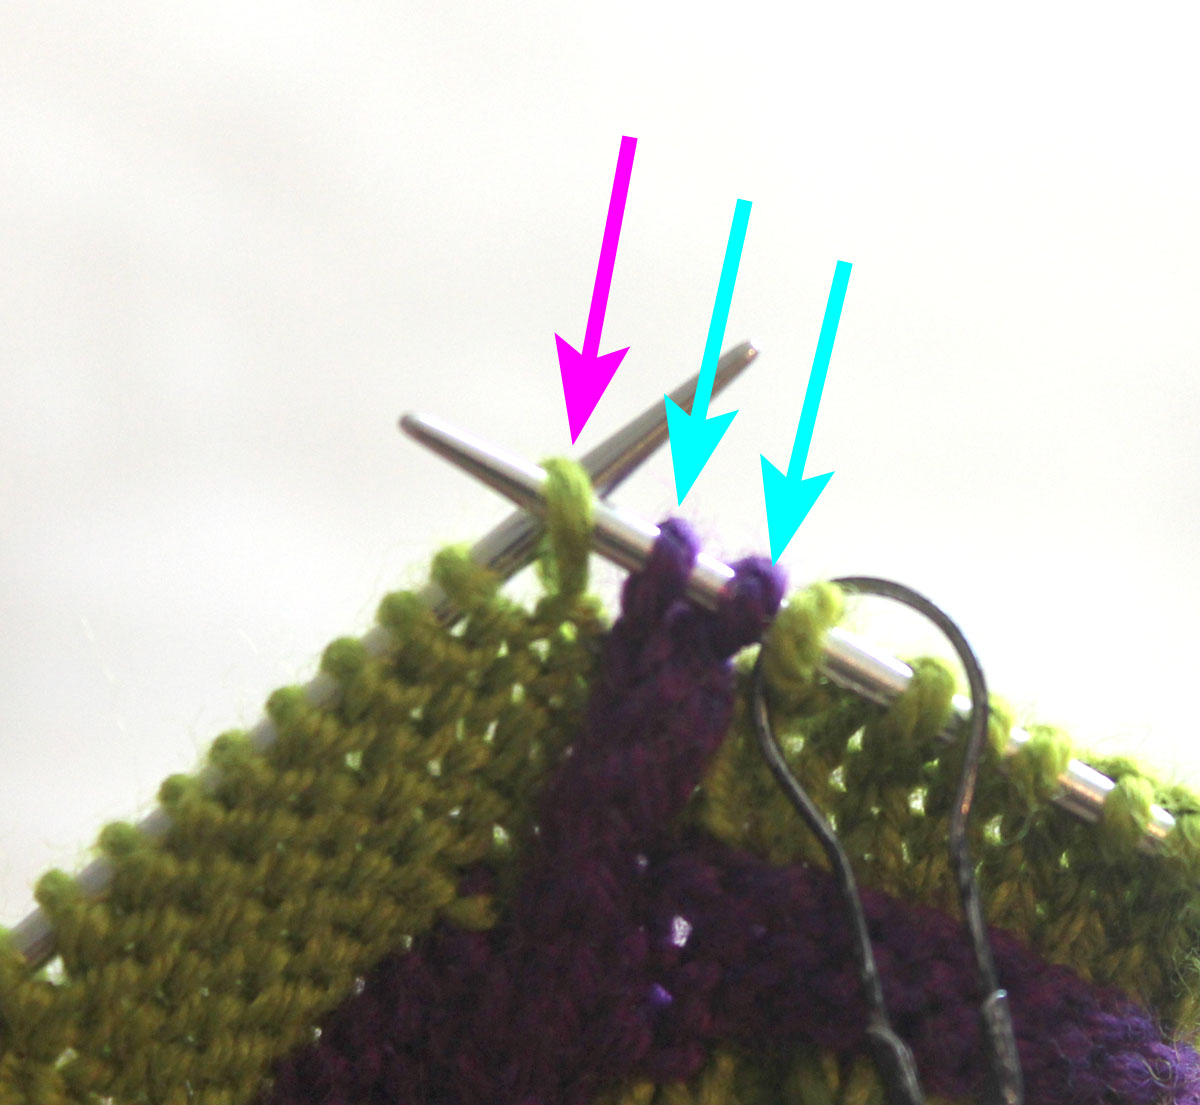
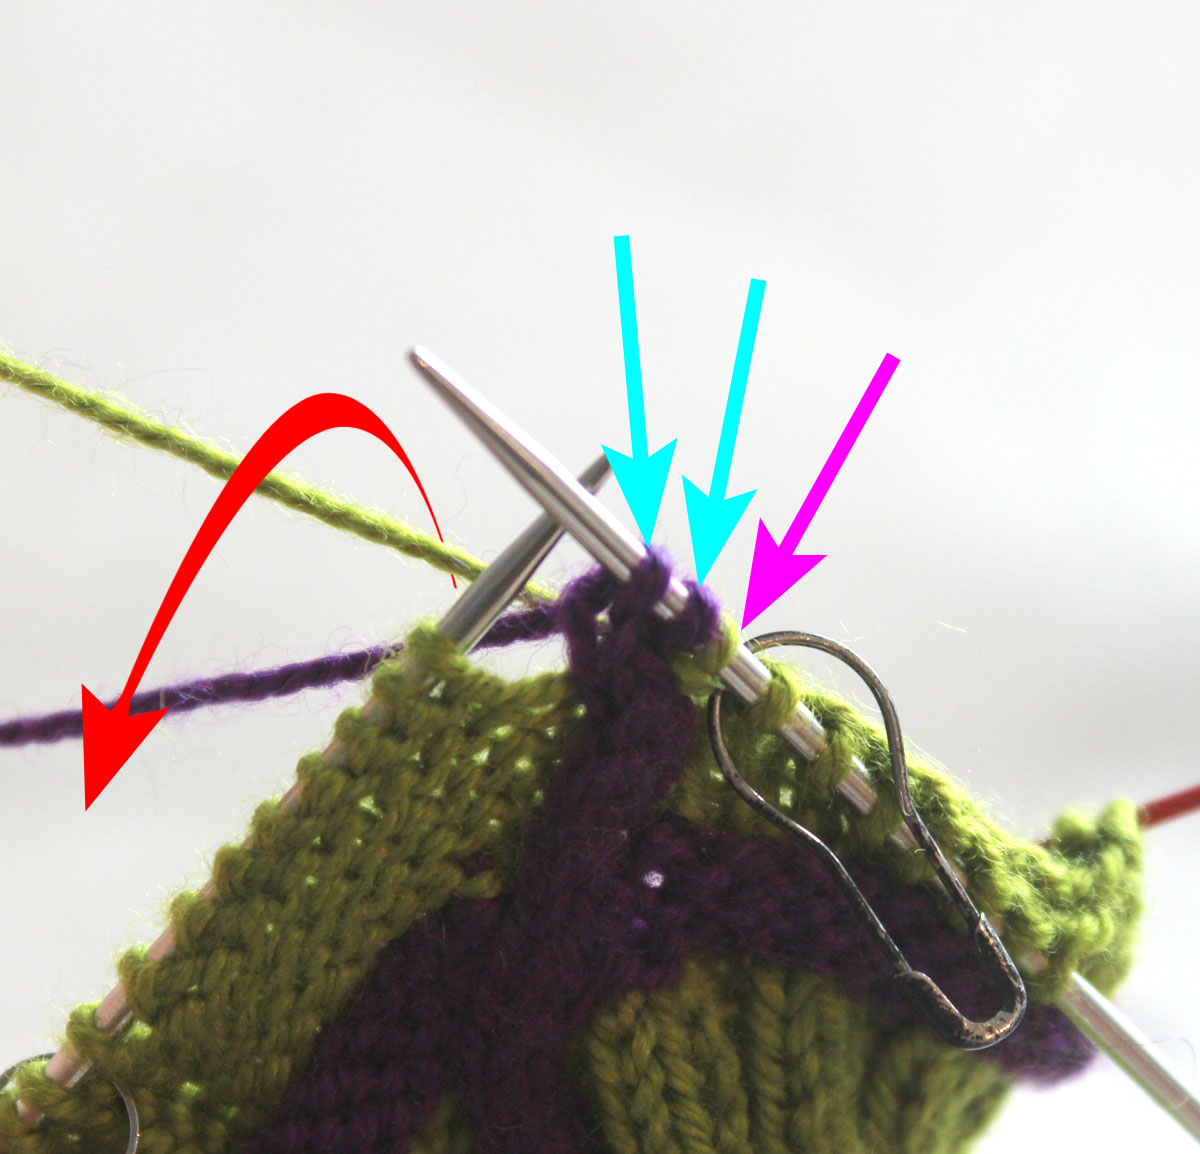
3. Insert Left Needle into the front legs of the 2 cable stitches (blue arrows) and in front of green (MC) stitch .

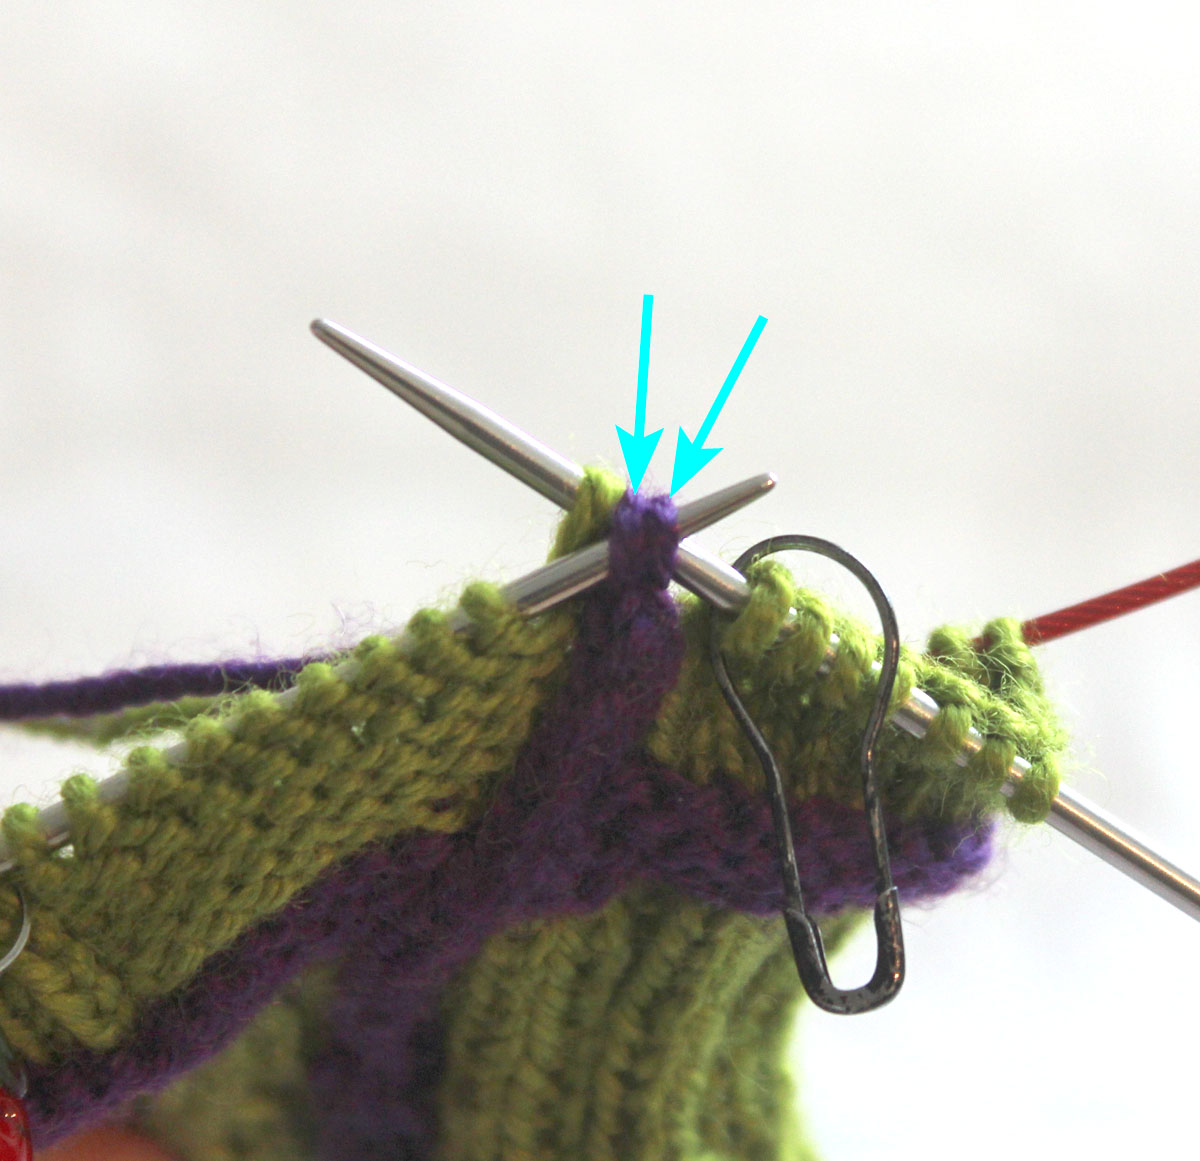
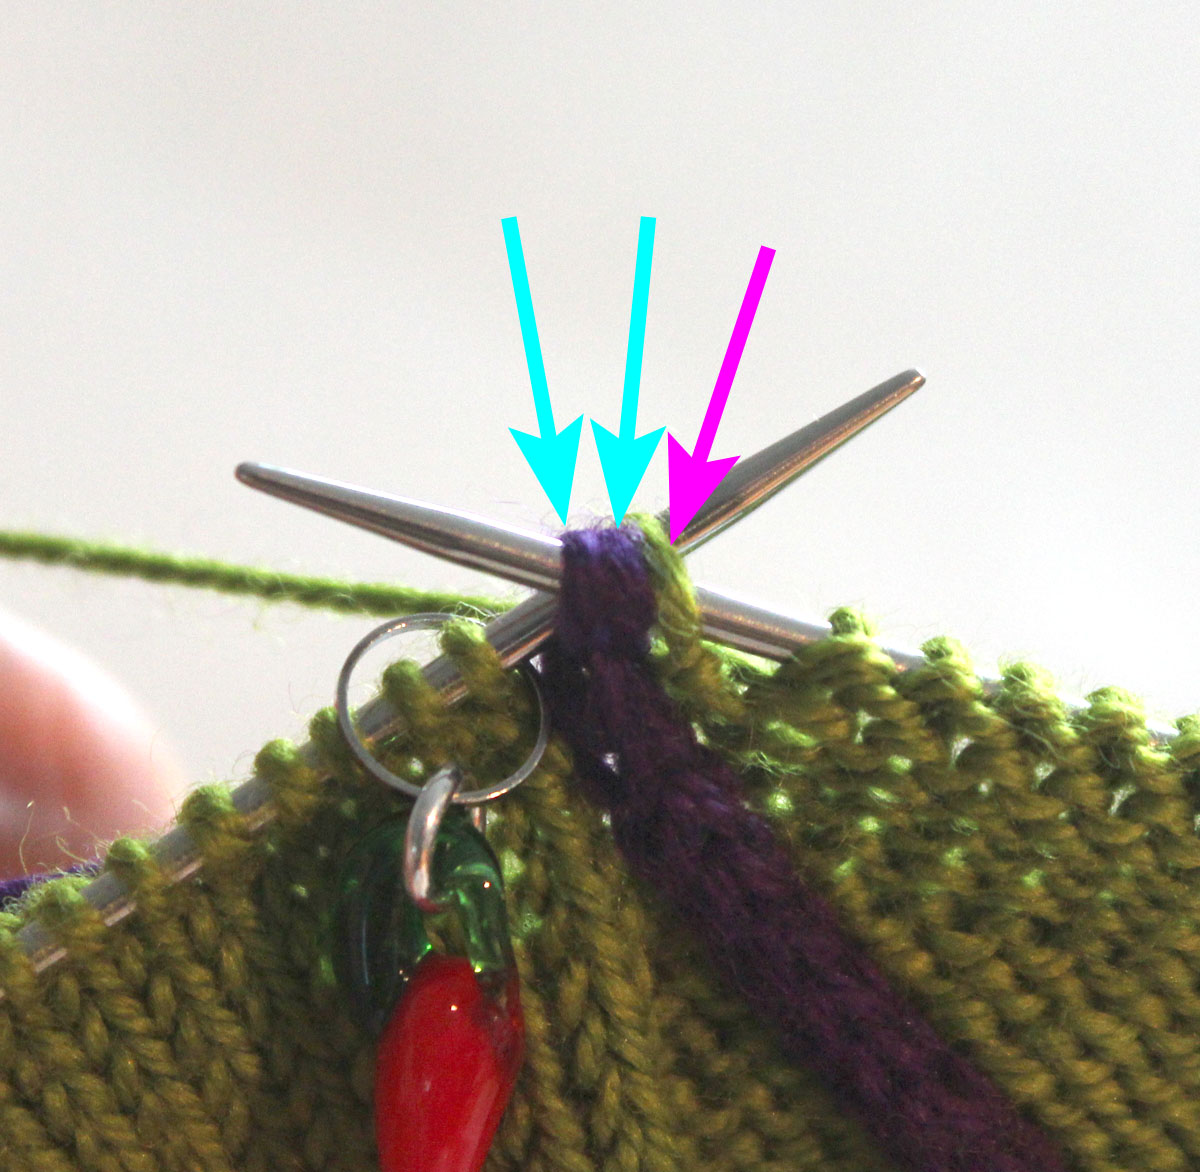
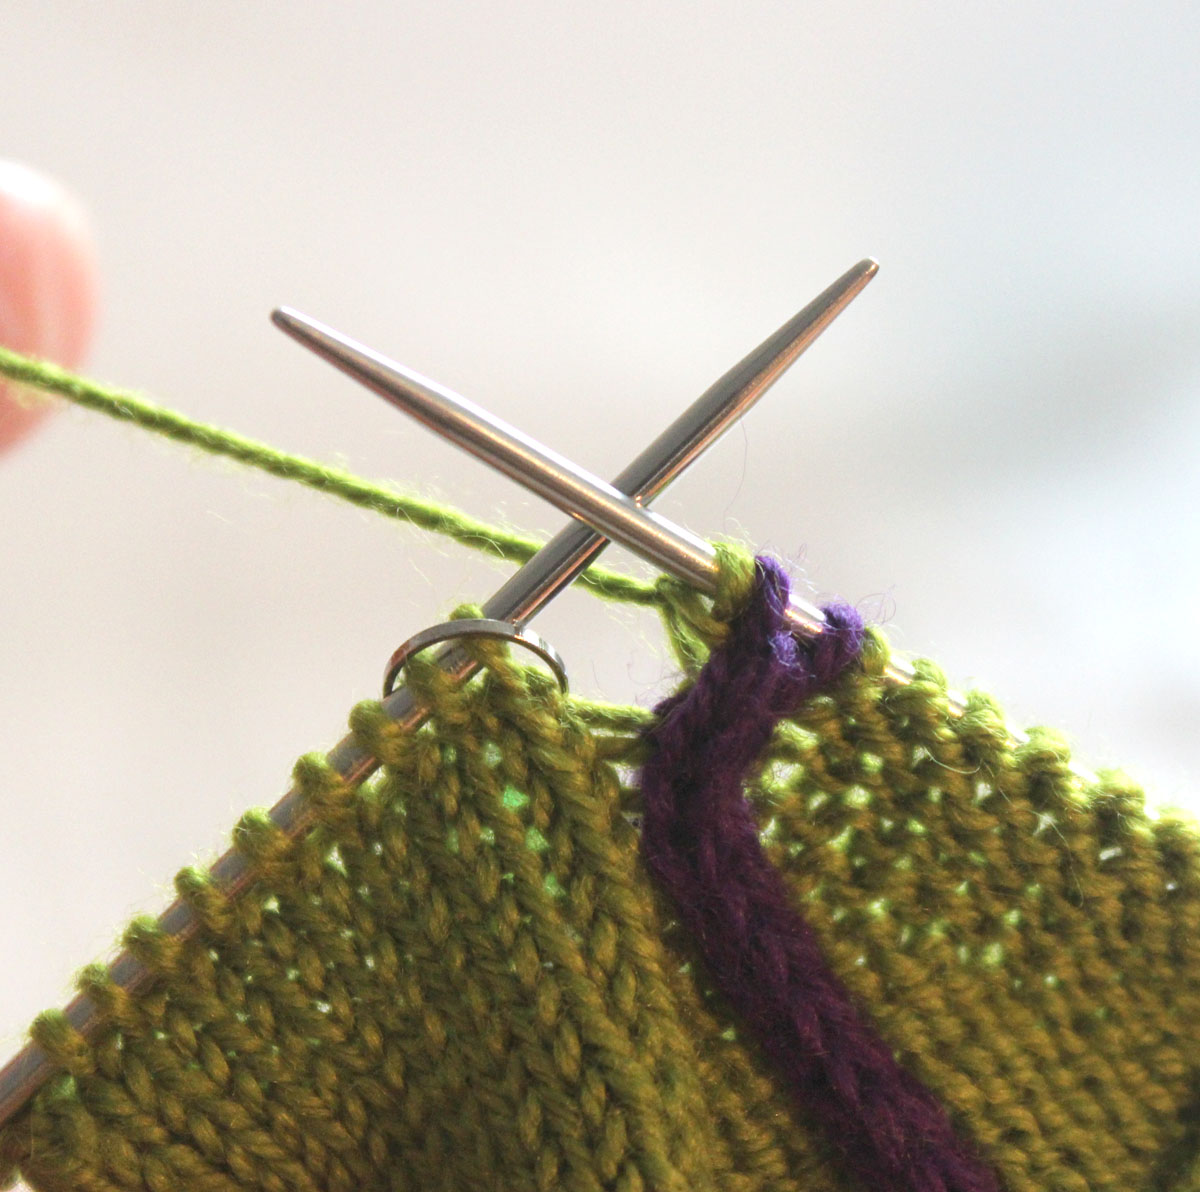
4. Slide the 2 cable stitches to the Left Needle, slide green stitch off the Right Needle and pin the stitch with your index finger to hold it in place (this is more important with a slippery yarn). Don’t panic.
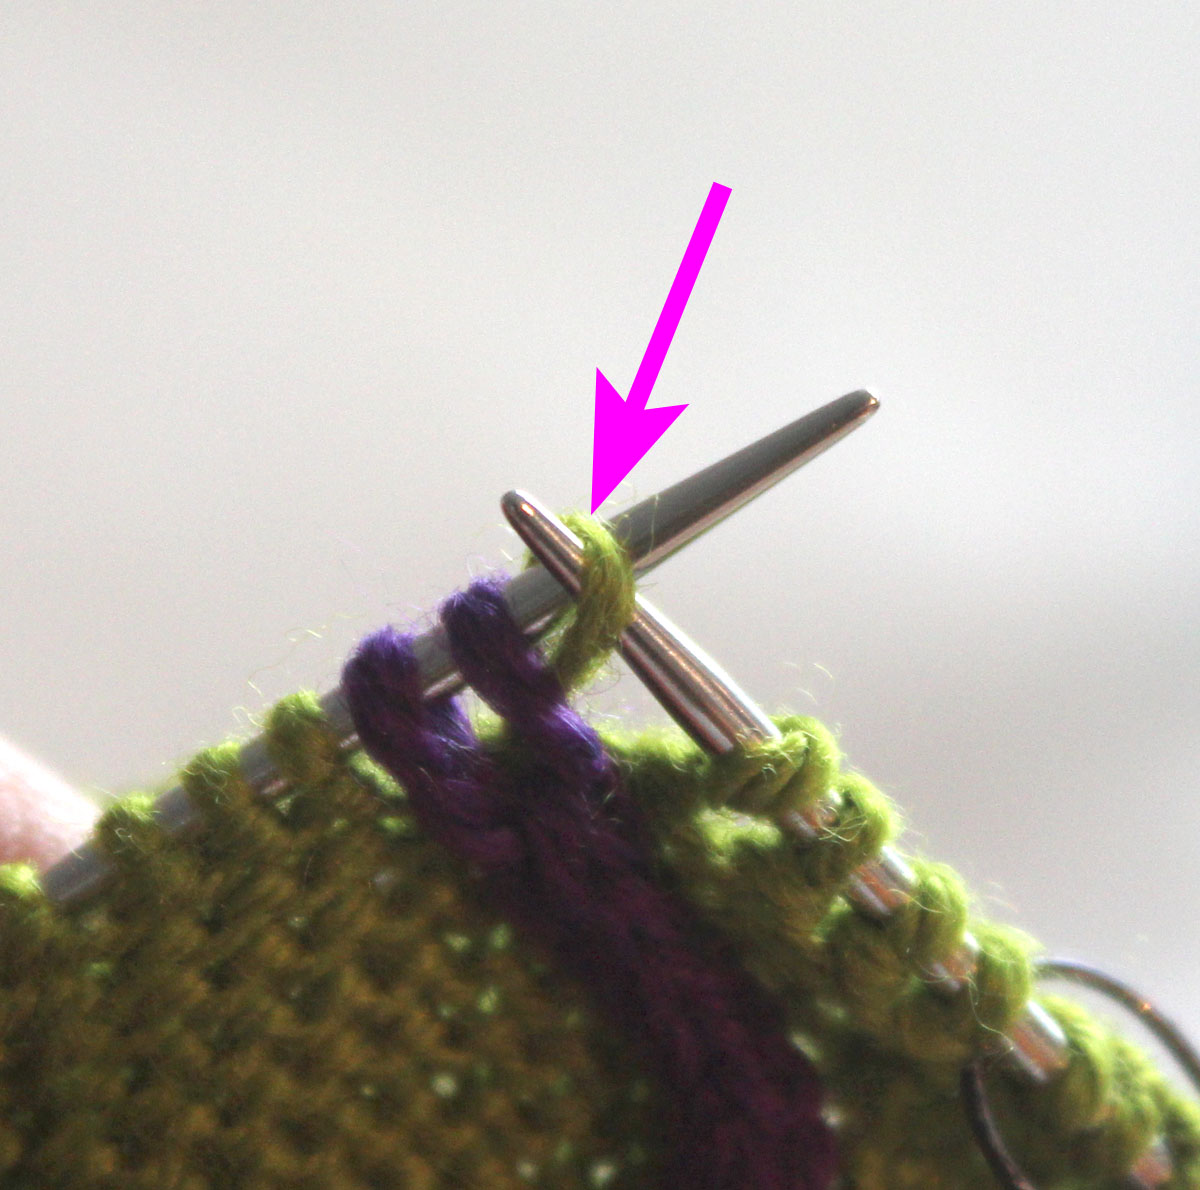
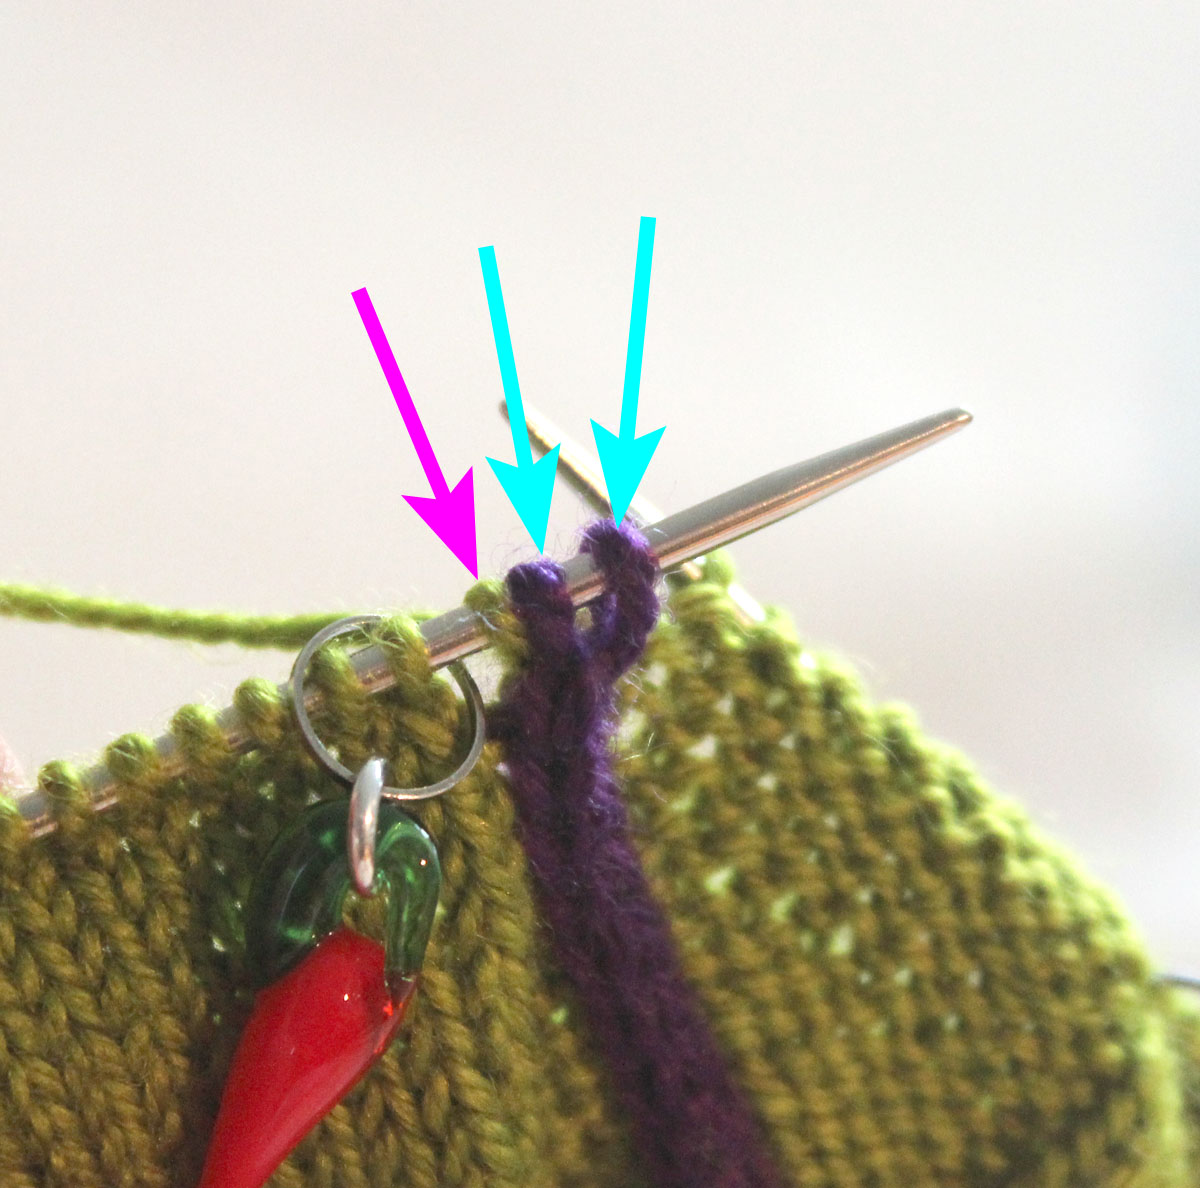
5. Rescue the freed green stitch, that is, pick it up with the Right Needle and then slip it back onto the Left Needle. The 3 stitches are now in the correct order. Next you just need to pay attention to which yarn goes where.

6. Work the rescued stitch with MC.
(For Mio gloves this is a purled stitch because the cable snakes its way from side to side in a purled panel.)
7. Lay green (MC) on top of purple (CC), so that CC comes up from below and around to catch MC.
Knit the 2 cable stitches with CC.
8. The 3 manipulated stitches have been knitted. Now continue with MC:
Lay purple (CC) on top of green MC.
Bring green MC up from below and around to catch CC.
Done!
Snaking Right (C2R)
1. Work to 1 stitch before the 2-stitch cable.
Slide the next 3 stitches to Right Needle.

2. Insert Left Needle into back of single green (MC) stitch behind the cable stitches.

3. Slide the 2 cable stitches off Right Needle and pin them with your thumb to the Left Needle so they don’t run off somewhere. Keep calm.

4. Rescue your unmoored cable stitches. That is, pick them up with the Right Needle in front of the slipped green stitch.
5. Slip the 2 cable stitches back to the Left Needle.
The 3 stitches are now in the correct order and are ready to be worked.
6. As before, rest green (MC) on top of purple (CC), so that CC comes up from below and around to catch MC.
Knit the 2 cable stitches with CC.
7. Rest purple (CC) on top of green (MC), so that MC come up from under and around to catch CC, continue with green (MC).
Done!
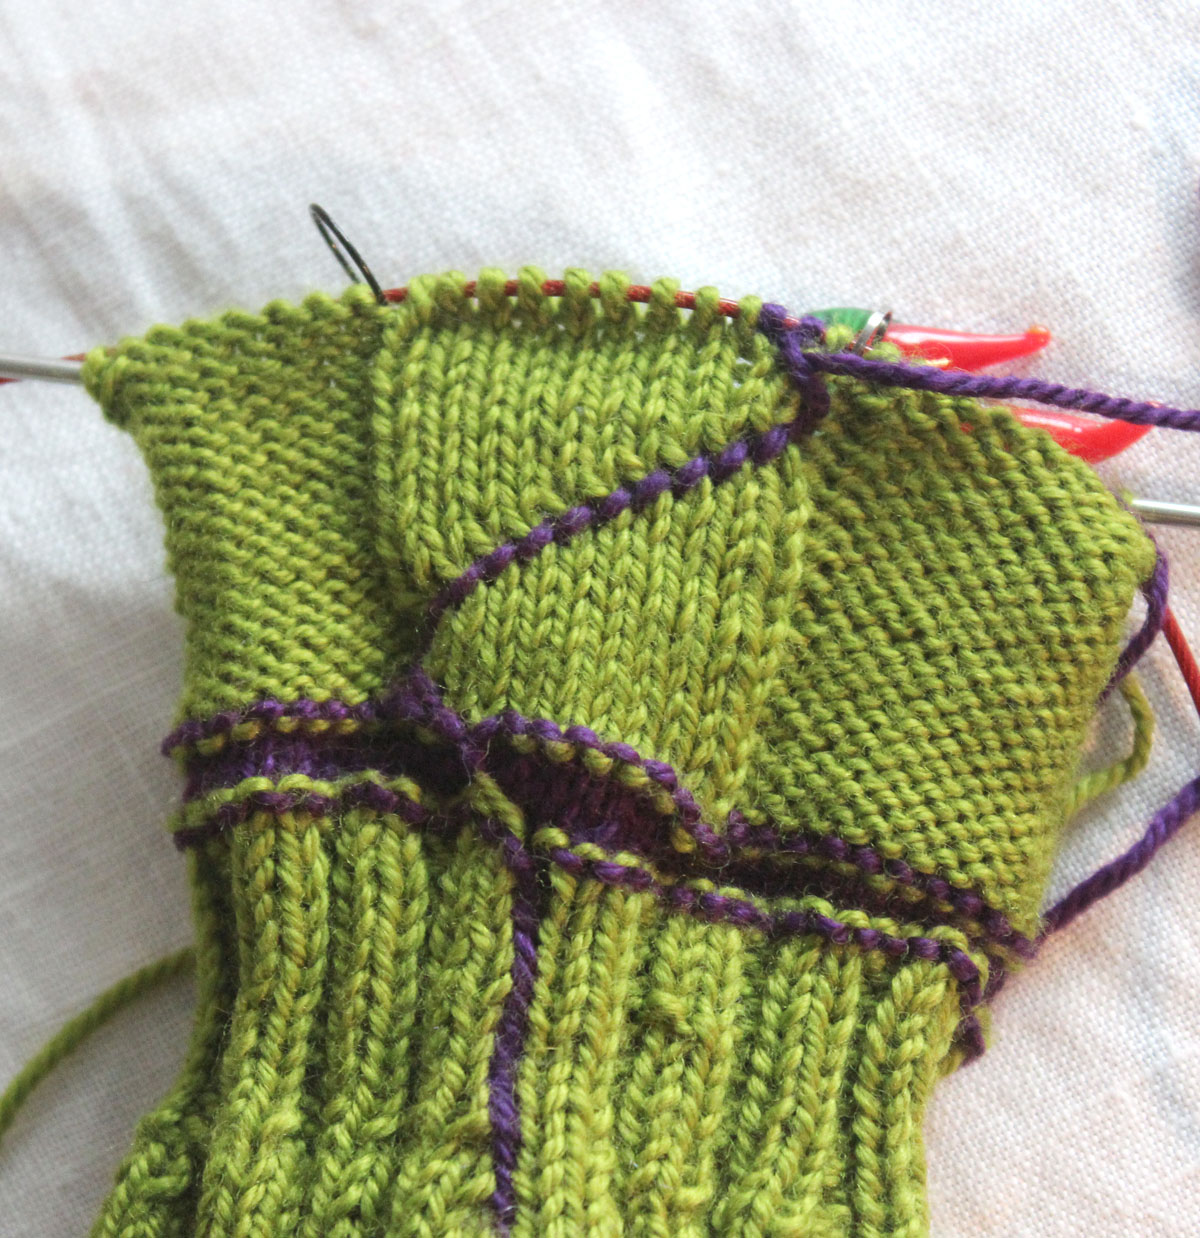
This is what it looks like on the Wrong Side. Or at least what it should look like.
Tip 1: If you are snaking two cables as on the Mio glove/mitt (one on the back of the hand, one on the thumb gusset), make sure you are always picking up the correct contrast yarn! It’s all too easy to grab the wrong one when you’re working in such tight quarters.
Tip 2: Detangle often. Very often – maybe even after every round. This will save you some frustration.
Yarn in tutorial photos: Wollmeise Blend, a soft and supple sport weight yarn in a blend of merino, cashmere, and polyamide.
Colours: Grünfink (green) & Amethyst Dunkel (dark)
Top photo: Meilenstein (purple) and Grünfink
Want to know what else is up my knitted sleeve? Sign up for the occasional Åsa Tricosa Newsletter.

4 Comments
Asa you really do have the most wonderful tutorials! Thank you so very much, I’ve learnt some fantastic tips from you.
I plan to link your website into my next post to let my followers know of your fabulousness. If you are uncomfortable with this, please do let me know.
With very best regards,
Cath
Wow, that’s very nice praise. Glad you like it! And please link away! Cheers! åsa
Precious hints & links. Thank you.
Glad you find them helpful! Thanks for posting! /åsa